

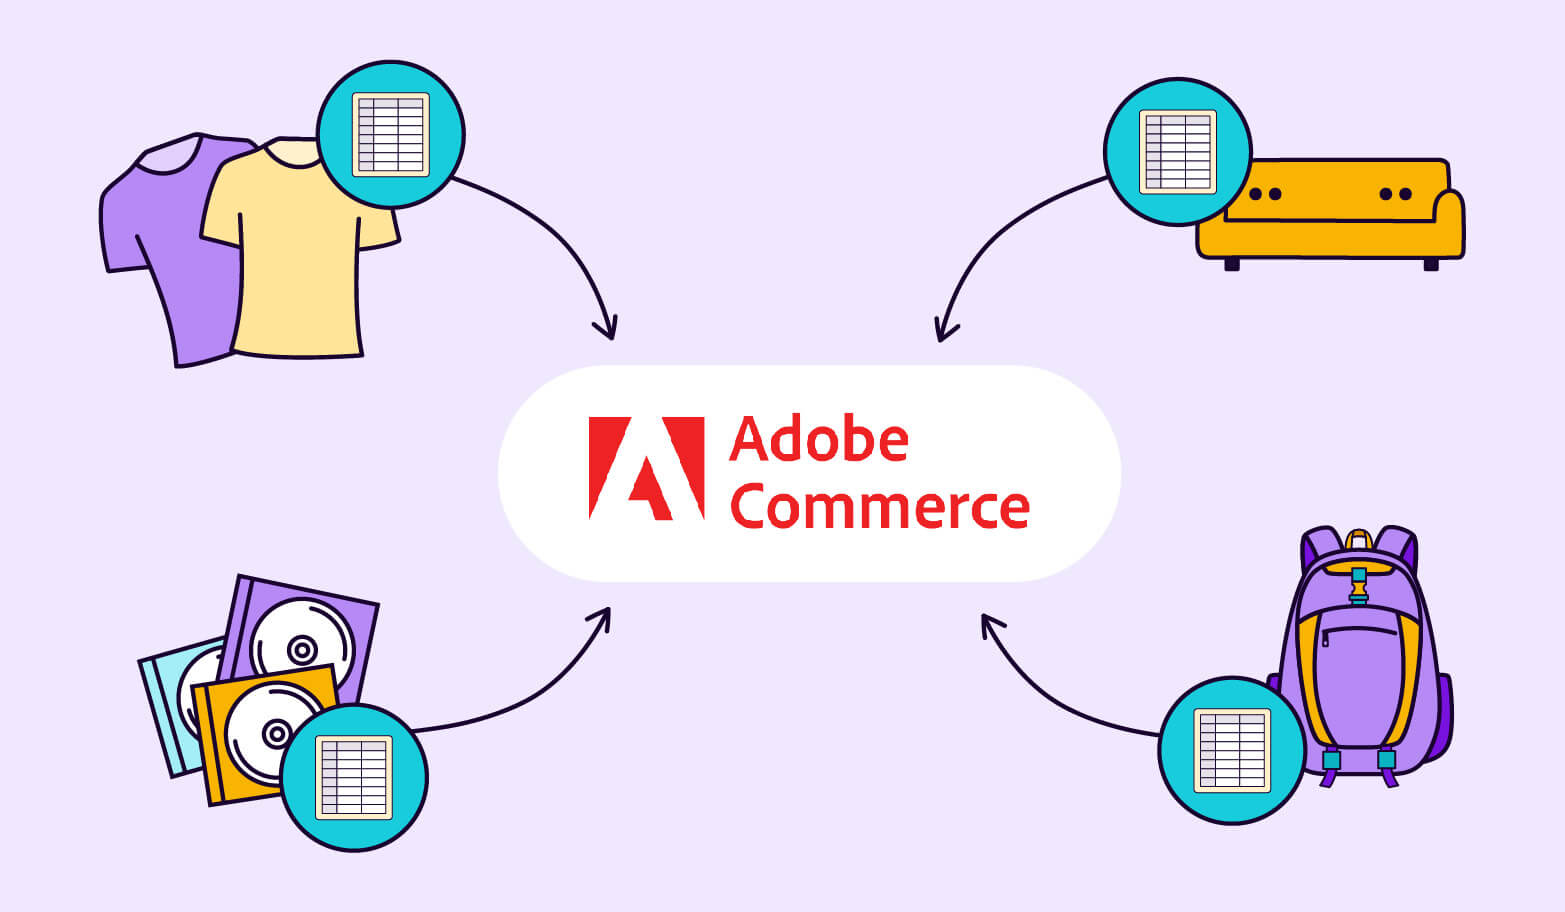
Formerly known as Magento Commerce Cloud, Adobe Commerce is a powerful ecommerce platform used by some big names around the world, such as Coca-Cola, T-Mobile, and my personal favorite, Krispy Kreme. Like all ecommerce platforms, though, it has its own methods, requirements, and restrictions when it comes to uploading your data.
That’s what I’m going to go over in this article: a step-by-step guide to getting your data from wherever you’re storing it now into the Adobe Commerce system.
Part 1: Get a CSV template
To upload your data to Adobe Commerce, you’ll need to use a CSV file that matches their requirements. Rather than trying to create one from scratch yourself, your best option is to use the template you can download from Adobe directly by following these steps.
- In Adobe, head to the Admin sidebar and click on System.
- Then choose Data Transfer, and then Import.
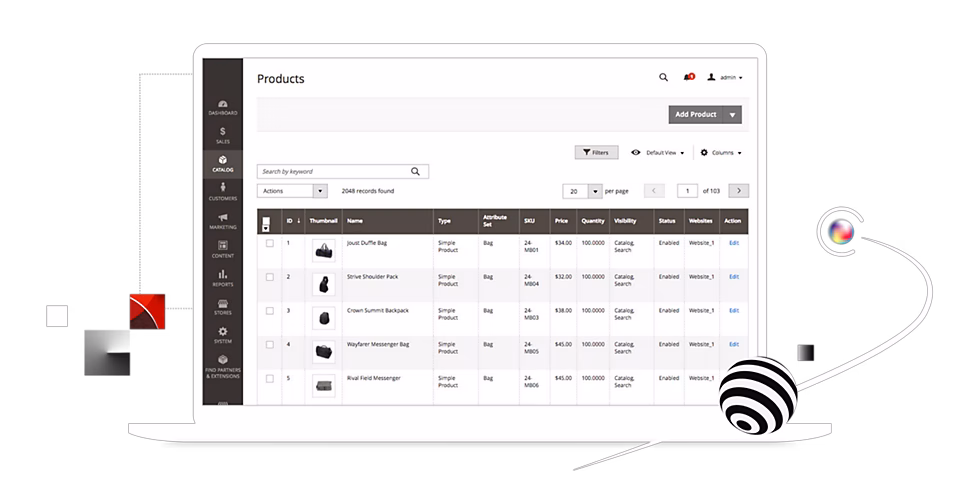
- Under Import Settings, go to Entity Type, and choose Products.
- Click Download Sample File.
- Head to your Downloads folder to find your sample CSV.

Part 2: Make your data match that template
Once you have your sample product data CSV, you have two options:
- Copy your data into the relevant columns in that file, which may take some time, depending on your setup and how much data you have.
- Copy the column headings into your original spreadsheet, making sure they’re written exactly the same as they are in the sample—be careful about things like extra spaces at the end of each heading.
Generally speaking, the second option is probably the faster choice, especially as the order of the columns doesn’t matter. That means you can keep your data organized as it is now, and just change the top cell in each column to match the name required by Adobe—like renaming your Short Description column “short_description,” for example.
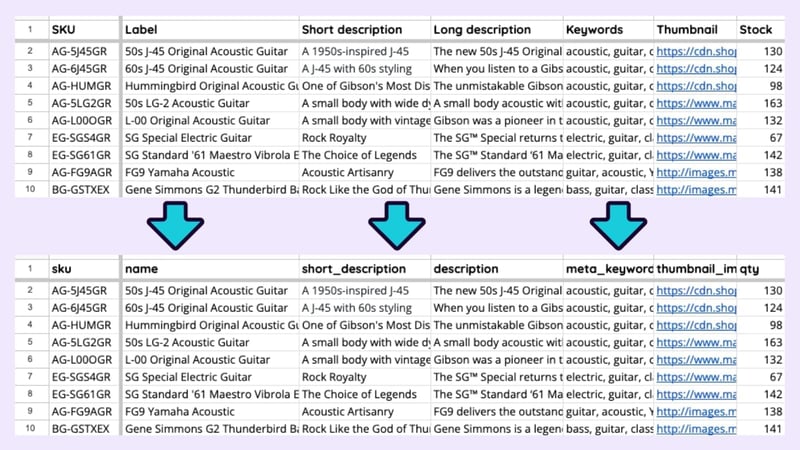
Any blank columns will be ignored, and the only required column/field for each product is the one named “sku.” For more information about each of the columns and the data attributes they contain, you can check out Adobe’s product data attributes reference page.
Part 3: Prepare your product images
You can use your CSV upload to add product images to their respective products too, and again, you’ve got two options.
- Use images stored in your Commerce folder on the Adobe server by adding the file path to your CSV. There are a few different ways to get your images into the Adobe system, and there are detailed instructions on the Adobe product image import page.
- Use images hosted on an external server by adding the relevant URLs directly to your CSV (e.g. https://example.com/image.jpg).
Then just add either the URL or the file path for those images’ location to your CSV, under the column Images File Directory.
Part 4: Adjust your import settings
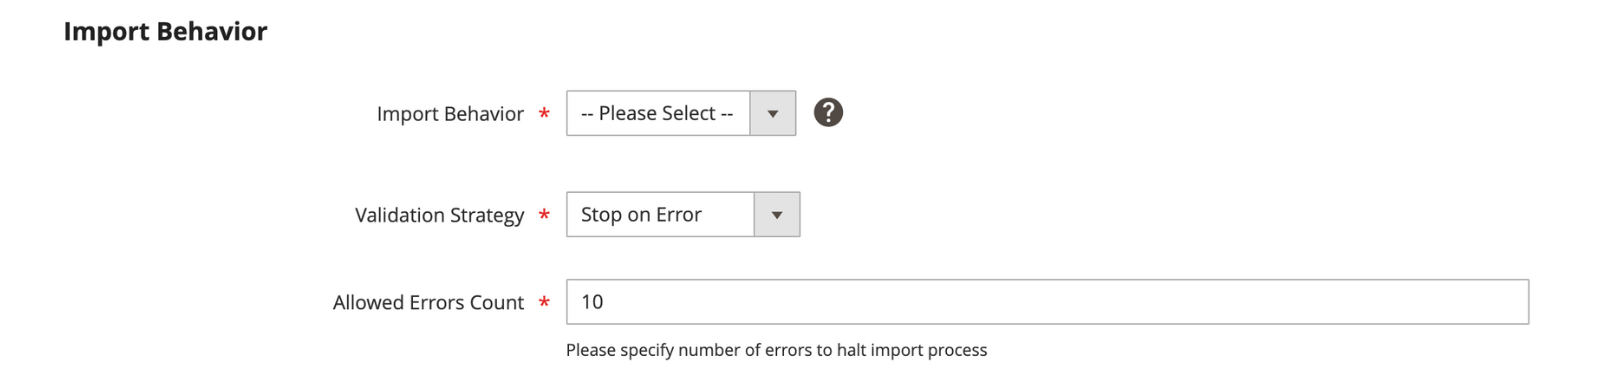
First, choose your Import Behavior. This tells the system whether you want to add to the information that’s already been uploaded, completely replace everything, or just delete things from your database.
- Add/Update: This is the option you should select if you have existing products in the database already that you want to keep. Every column/field apart from “sku” can be updated.
- New products in your CSV (that have a new SKU) will be added to your database with all their associated data.
- Products with SKUs that are already in your database will have their data replaced with the new data associated with that same SKU in the CSV that you’re uploading.
- Replace: If you want to hit reset on your Adobe Commerce data, this is the one. This will erase all the product information that you’ve previously uploaded, and then replace it with the data/products in your CSV.
- Delete: This is essentially a quick way to erase a whole bunch of products from your store. If you choose this option, the importer will only pay attention to the “sku” column in the CSV you upload, and will erase the products in your database that match those SKUs.
Next, decide how to deal with errors. Errors can occur for a number of reasons, often because of either non-existent or duplicate SKUs, and it’s up to you how many errors to allow before canceling the import completely.
- Select Stop on error if you want the system to cancel the import as soon as there’s a single error in a product.
- Skip error entries will tell the system to keep going if it finds an error, and to just not include that product.
- In Allowed Errors Count, you can also set a limit on how many errors the system can skip before it cancels the upload completely (the default setting is 10).
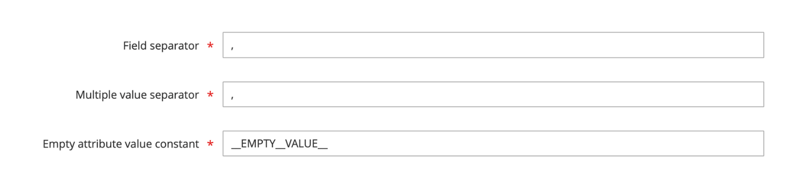
And then accept the default settings, unless you have a particular reason not to (such as using a separator other than a comma to separate multiple values within your CSV).
- For Field separator, that’s comma (,)
- In a typical CSV, the different attributes or fields are have commas between them.
- For Multiple value separator, it’s comma (,) as well
- This applies to attributes that contain multiple values.
- For Empty attribute value constant, it’s _EMPTY_VALUE_
- This applies when you’re updating existing products and want to make sure empty values in the new CSV overwrite any information that’s already in the Adobe system.
Part 5: Validate the data in your CSV
At this point, you should be nearly ready to import your CSV. Make sure it’s less than 2MB in size and uses UTF-8 encoding, and you’ll be good to go for this next step.
- First, click Choose File and find your CSV.
- Select your CSV and click Open.
- If you’ve uploaded your images to Adobe’s server, enter the relative path for their location there in the Images File Directory (again, you can find more information about that on their Product image import page).
- Click on Check data in the top-right corner, and wait for the process to finish.
- If everything’s okay, you’ll get a message saying that your file is valid and that you can click on the Import button, so go ahead and click it!
- If there’s an error preventing the import, you’ll get a warning message telling you so. In this case, you’ll need to correct the error in your CSV file and then go back to step 1 of this part.
- A confirmation message will appear once the import has finished.

Success! (source)
Part 6: Check the import history (and see if there were any errors)
When your import has finished, Adobe Commerce will generate a file with all the relevant information about that import. This includes who initiated the import, when it happened, how long it took, and a summary of how many products were created, updated, or deleted. You can also see any errors that occurred—just follow these simple steps.
- Head to the Admin sidebar, then click System.
- Then go to Data Transfer, then Import History.
- Use the date/time to find the file you want, and then click Download.
A faster alternative: PIM software
Even with the CSV template and the steps laid out here, uploading data to Adobe Commerce can get pretty technical when you try and do it using simple spreadsheet software like Google Sheets or Microsoft Excel. It’s complicated to deal with digital assets, relationships between products, and large numbers of SKUs in these programs, especially when you’re then trying to get everything you need into that all-important CSV file for import.
For that reason, a lot of businesses make the switch to specialized software once they reach a certain point in their ecommerce journey. For product information, the best option out there is product information management or PIM software.
Using a PIM for Adobe Commerce (Magento) simplifies the whole import process by giving you one central hub where you can store and organize your data and your images, videos, and other files, and then use export features to make everything match Adobe’s requirements before you send it their way. You can also combine these tools with plugins or FMS to have scheduled updates and automate even more of this process. To learn more, just check out the ebook below.

What if your product data actually worked for you?
We’ll show you how Plytix helps you stop fixing data—and start using it.


Think others should see this?
Go ahead and share it.