The last thing you want is for your customers to be lost on your webshop looking for a product. A cluttered, hard-to-navigate online store is the fastest way to say "goodbye" to potential conversions. It doesn't give your customers a good user experience, and it doesn't allow you to showcase what products you have to offer.
Product categorization has a big impact. And, unfortunately, it's one element that many sellers overlook when thinking about how to boost conversions.
You've got the trendiest products, catchy product descriptions, and killer marketing campaigns. But if your customer feels like they're in a maze trying to find your sweatshirts section on your website, you've got a problem.
This problem applies to any webshop, regardless of the ecommerce platform, but in this article, we're going to dive into what this looks like in Shopify. If you use another ecommerce platform, feel free to sign up to our blog email to get alerts on when new content comes out, so you can see how to set up product categories in your ecommerce platform.
We're going to take a look at tips on how to plan your categories, how to set them up in the backend of Shopify, how to set them up on the front end of your web store, and then tips on how to get more conversions from your categorization.
The undeniable importance of product categories
Think of your webshop as a physical retail store. Product categories are like the signs hanging from the ceiling—pointing customers in the right direction. This not only saves your customers time and energy, but they'll also leave your store feeling positive about the experience, knowing they didn't have to spend hours searching and sorting through your products.
Your product categorization helps point your customers to go exactly where they need to on your webshop. But the problem is, most businesses don't know how to do this successfully. According to the Baymard Institute, "when it comes to Category Taxonomy, the average [ecommerce] site runs into significant issues, with a massive 88% performing “mediocrely”, “poorly”, or worse."
And, as I mentioned before, poor product categorization leads to a poor user experience which means you're not going to get the sales you want. Here are some numbers that show how important it is to give your customers a good user experience on your webshop:
- According to a study by Amazon Web Services, ecommerce businesses lose 35% of sales due to bad user experience. (Source)
- A survey of 6,000 consumers in the US and Europe found that 60% of consumers say they abandon purchases due to poor user experience on websites. (Source)
Give your customers the user experience they deserve so that they enjoy shopping with you. You'll begin to see your sales rise. And if you don't give your customers a good experience, well... you just read the numbers—no need to say more.
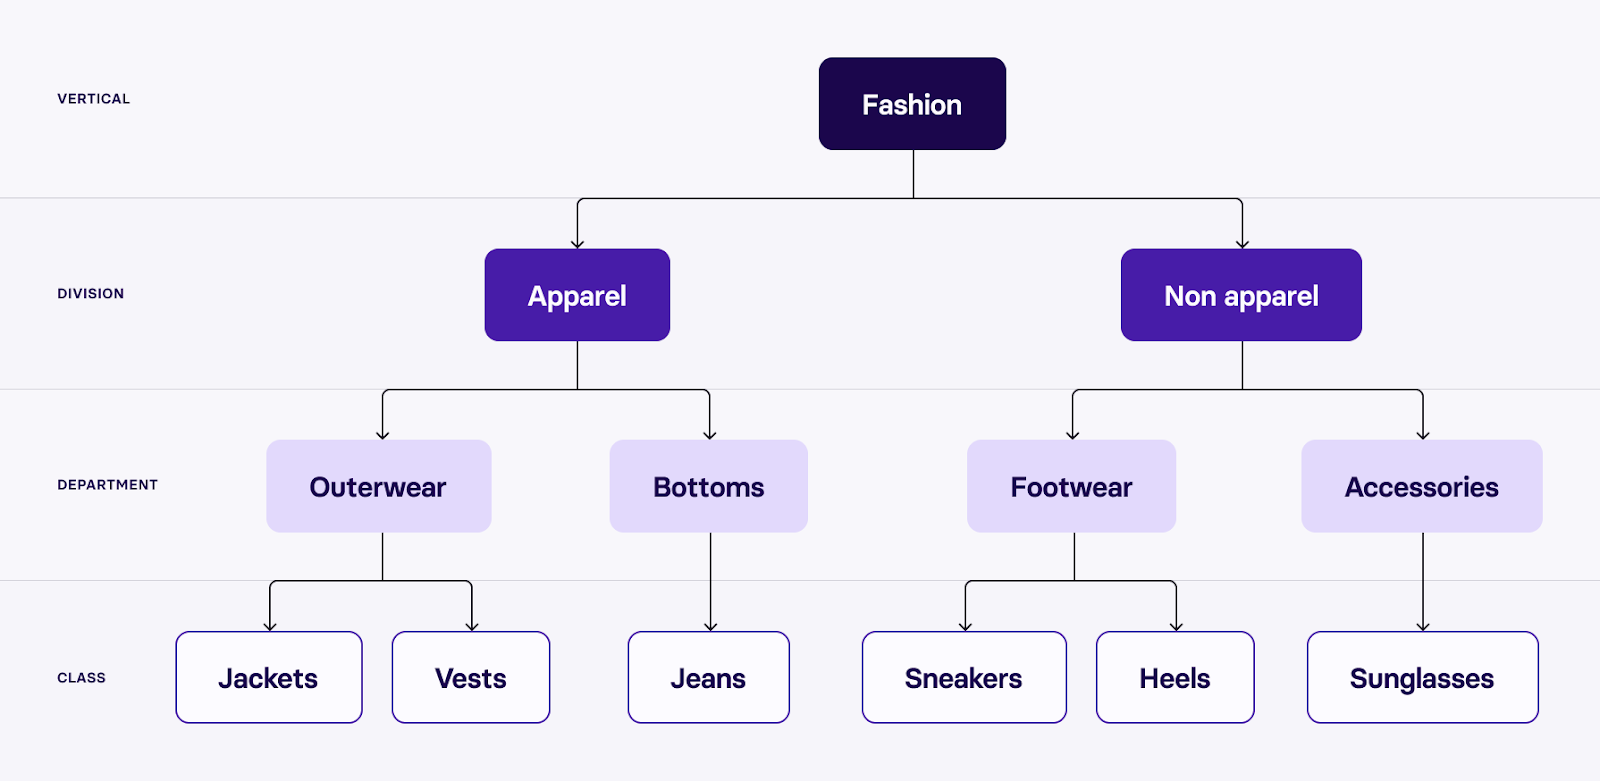
Planning your categories for your Shopify store: A bird’s eye view
When planning your product categories, you need to take a step back and plan it out well. Begin by creating a comprehensive list of all the products you intend to sell. Use the following tips to help create a structure your customers will appreciate:
- Create a spreadsheet: Include essential details like names, descriptions, pricing, and quantity in a spreadsheet.
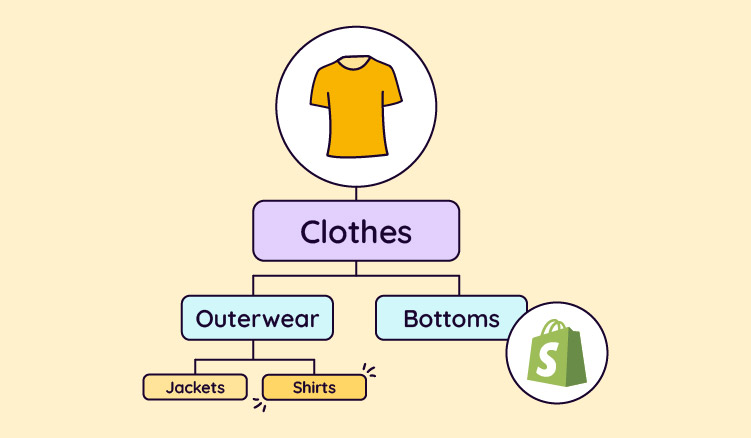
- Group products by similarities: Organize these products into groups based on common characteristics or themes, such as intended use, customer buying patterns, or seasonality.
- Think like a customer: Imagine navigating your online store from a customer’s perspective. Where would you expect to find each type of product?
- Keep it logical and intuitive: Ensure that your categories and subcategories make sense and are easy to navigate, aiming for a user-friendly experience that encourages conversions.
- Preliminary planning: Don't underestimate the importance of this step. Having a well-thought-out plan will set the foundation for a coherent and effective category structure.
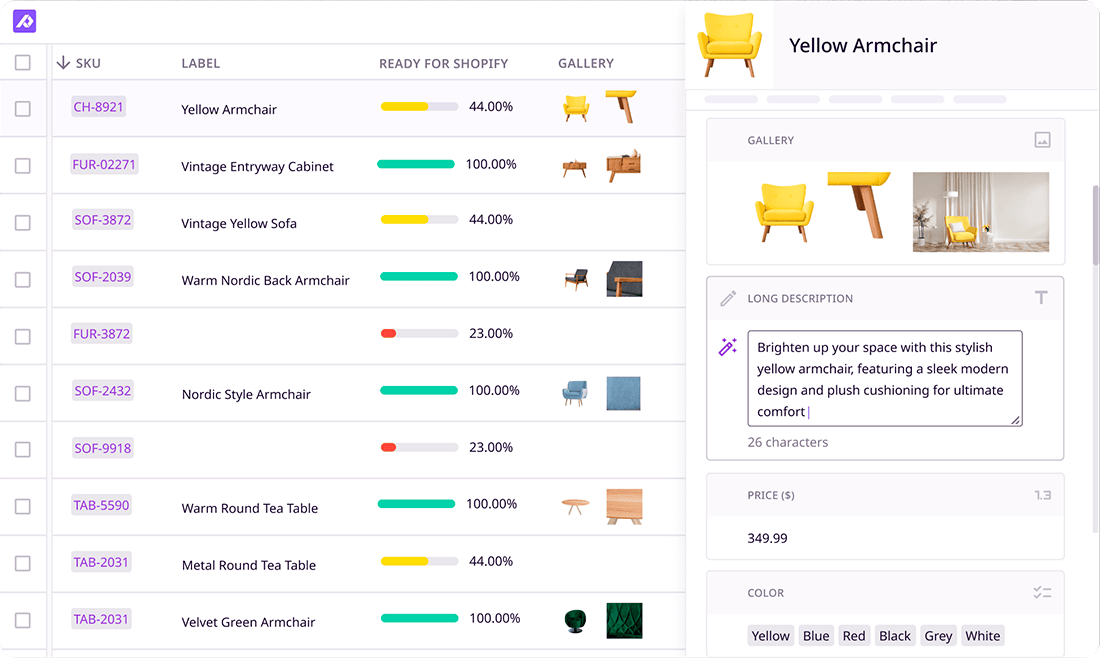
If Shopify is just one of several sales channels you’re using to sell your products, it’s worth considering PIM software to simplify the process of managing your product information. Using a PIM for Shopify ensures your product data stays consistent and lets you update information on your store and all other sales channels at once.
Step-by-step guide to creating categories in Shopify
Alright, you’ve done your homework. Now, let’s get those hands dirty by actually setting up your product categories.
Part 1: Set up your categories as collections in Shopify
Step 1: Login to your Shopify admin panel
No rocket science here—just log in.
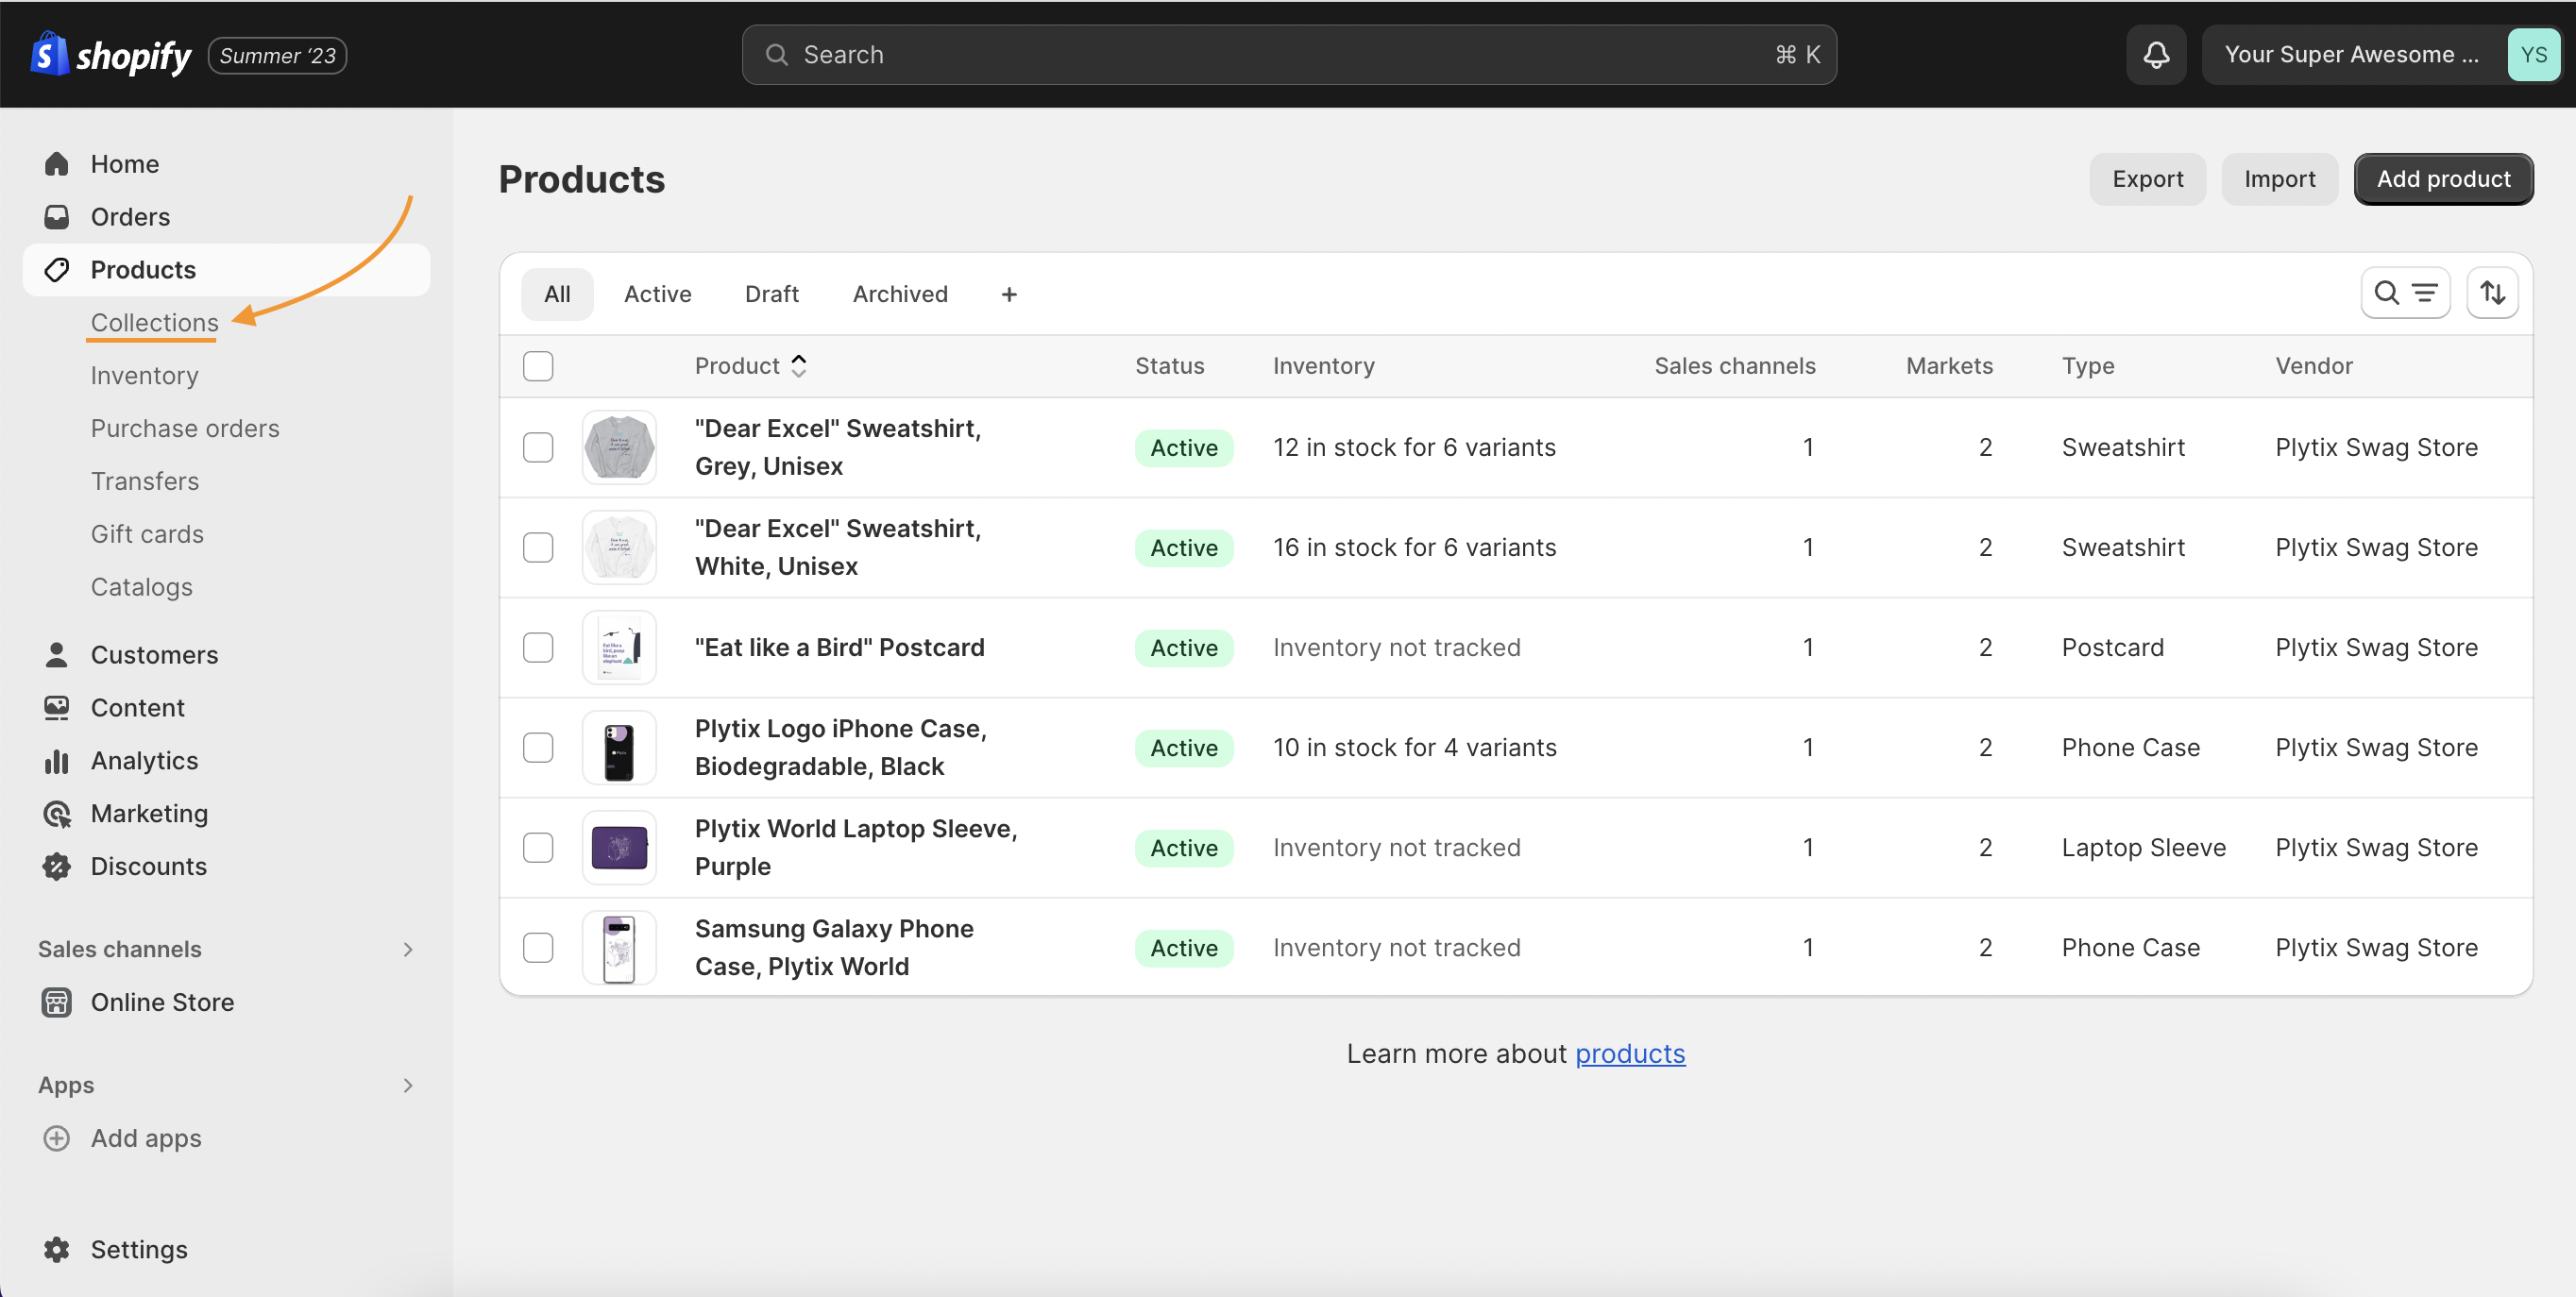
Step 2: Navigate to ‘Products’
On your admin dashboard, click on the 'Products' tab on the left sidebar.
Step 3: Click on ‘Collections’
Under the 'Products' tab, you'll find ‘Collections.’ Click on it.
Step 4: Create a new collection
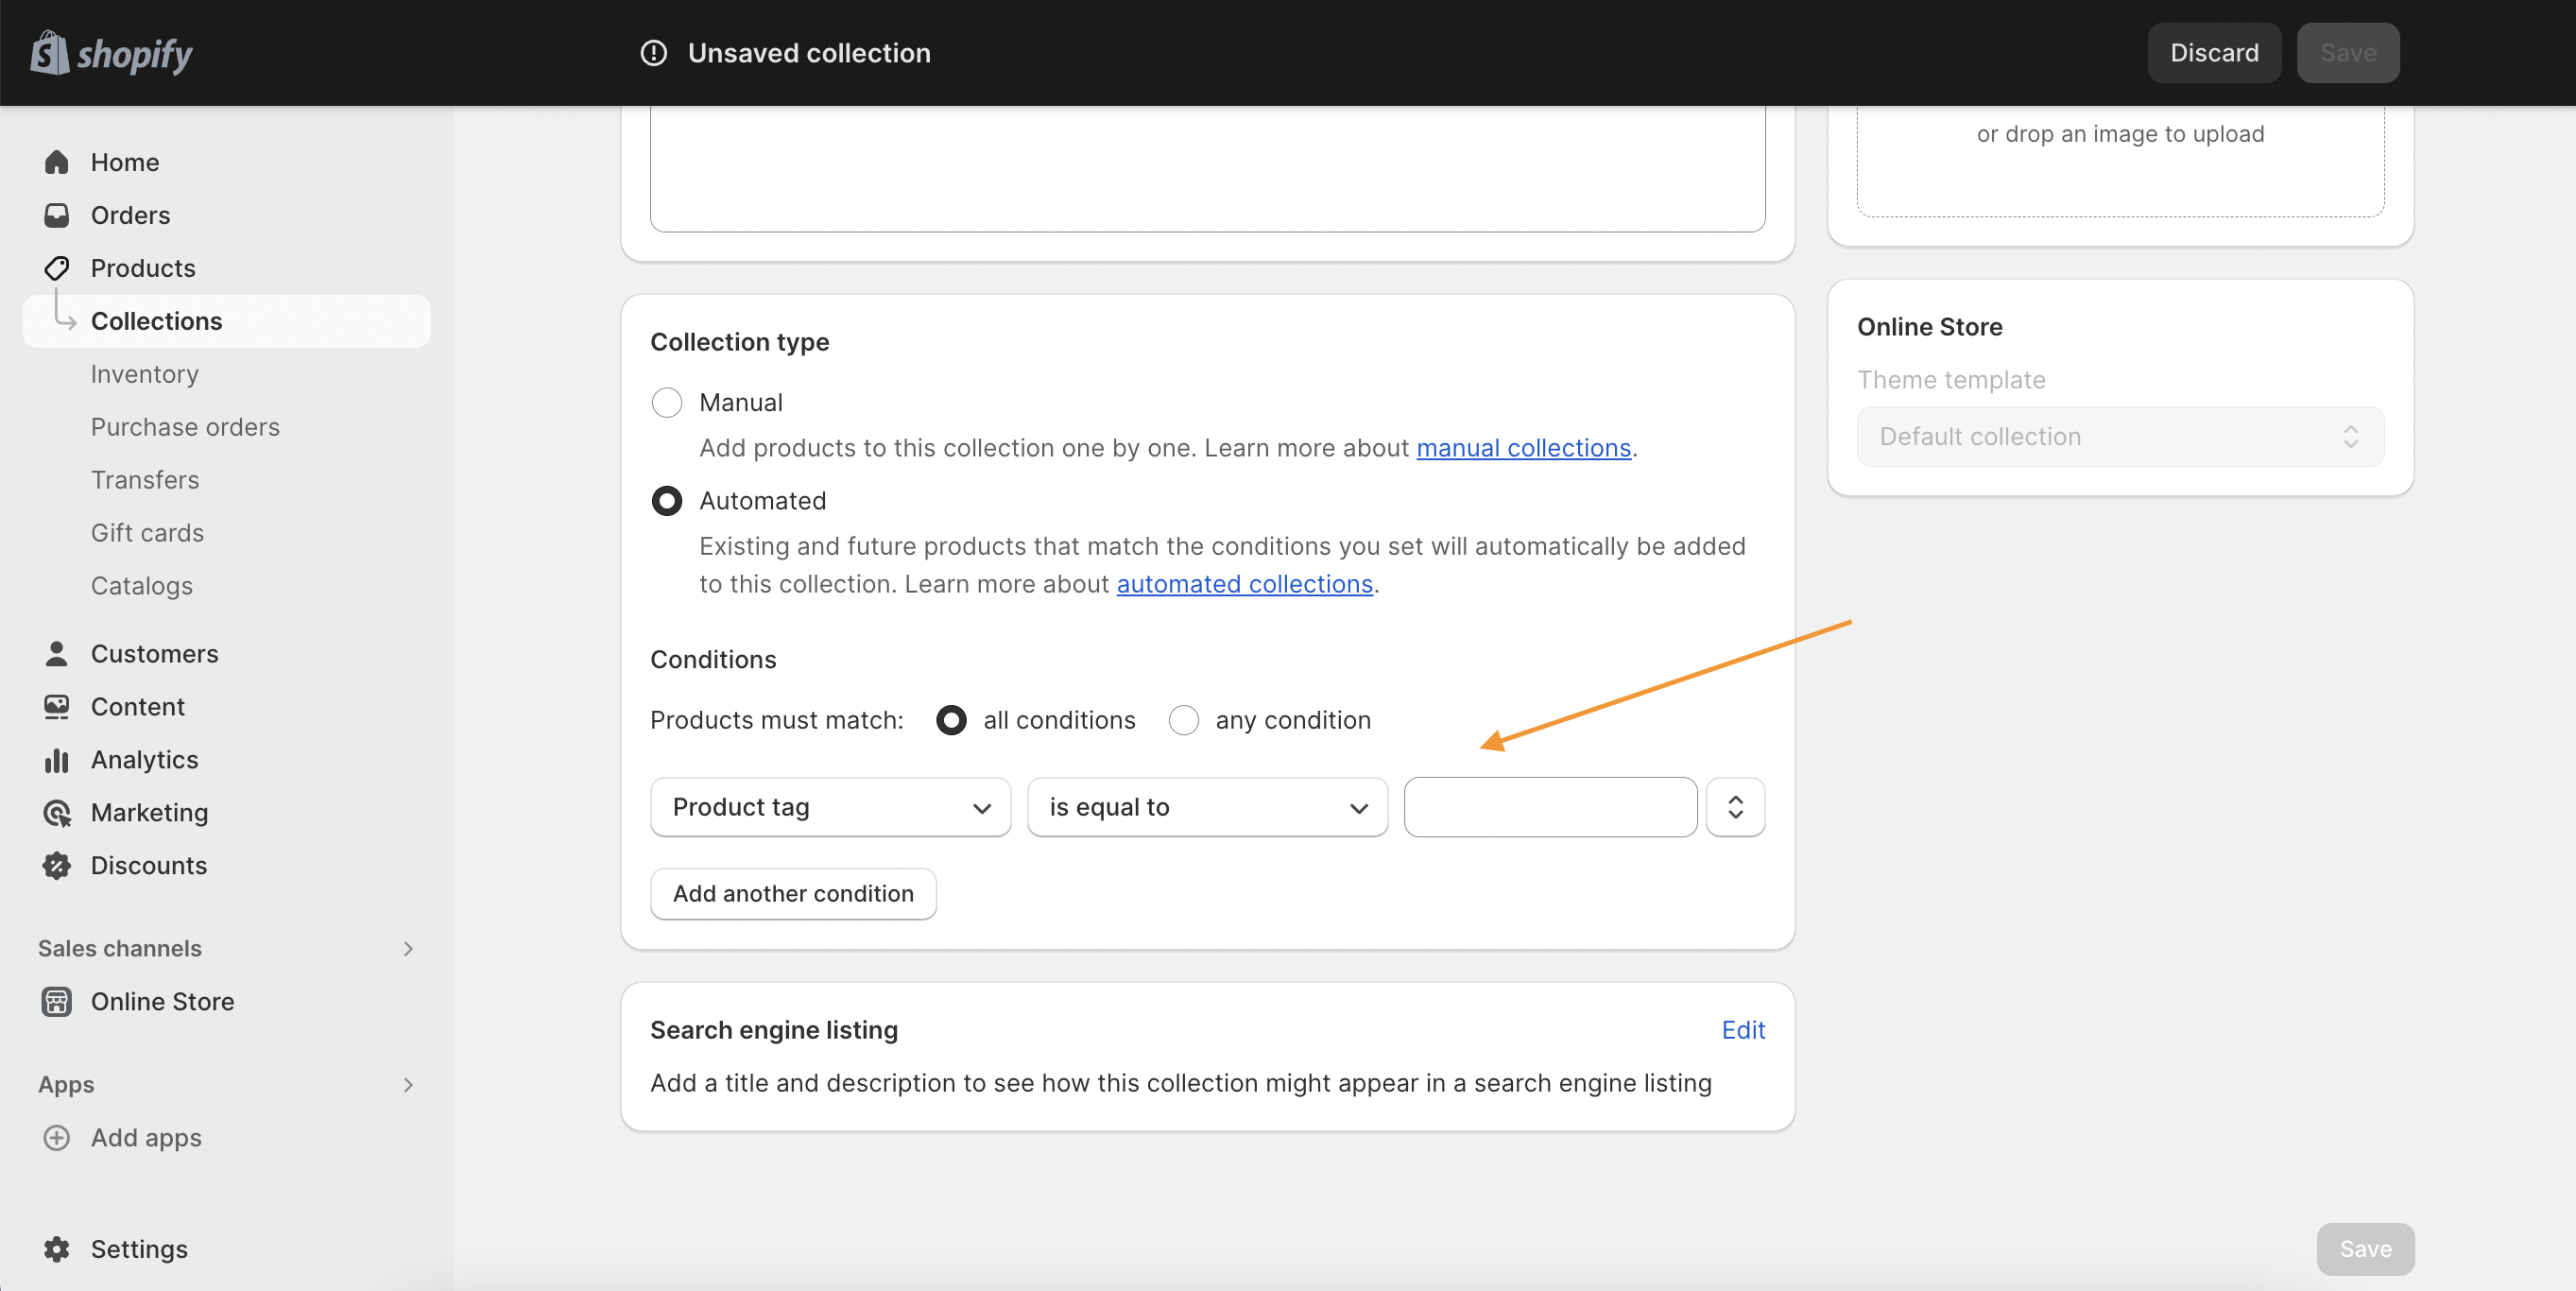
Click on the ‘Create Collection’ button, and Shopify will prompt you with two types of collections: Automated or Manual.
- Automated: Shopify automatically sorts products based on conditions you set.
- Manual: You add products manually to this collection.

Step 5: Add details
- Collection Type: Choose between 'Automated' and 'Manual.'
- Title and Description: Fill in the title and description for your collection. This is SEO gold, so make it count.
Step 6: Set conditions (if Automated)
If you chose 'Automated,' specify the conditions. For instance, if you're creating a ‘Summer Dresses’ category, conditions could be ‘Product Tag’ is equal to ‘Summer’ and ‘Product Type’ is equal to ‘Dress.’
Step 7: Add products (if Manual)
If you chose 'Manual,' you'll need to add products to this collection manually. Just click on the ‘Add Products’ button.
Step 8: Save and preview
Save your collection and preview it to see how it looks on your online store.
Part 2: Set up your categories in the navigation of your Shopify store
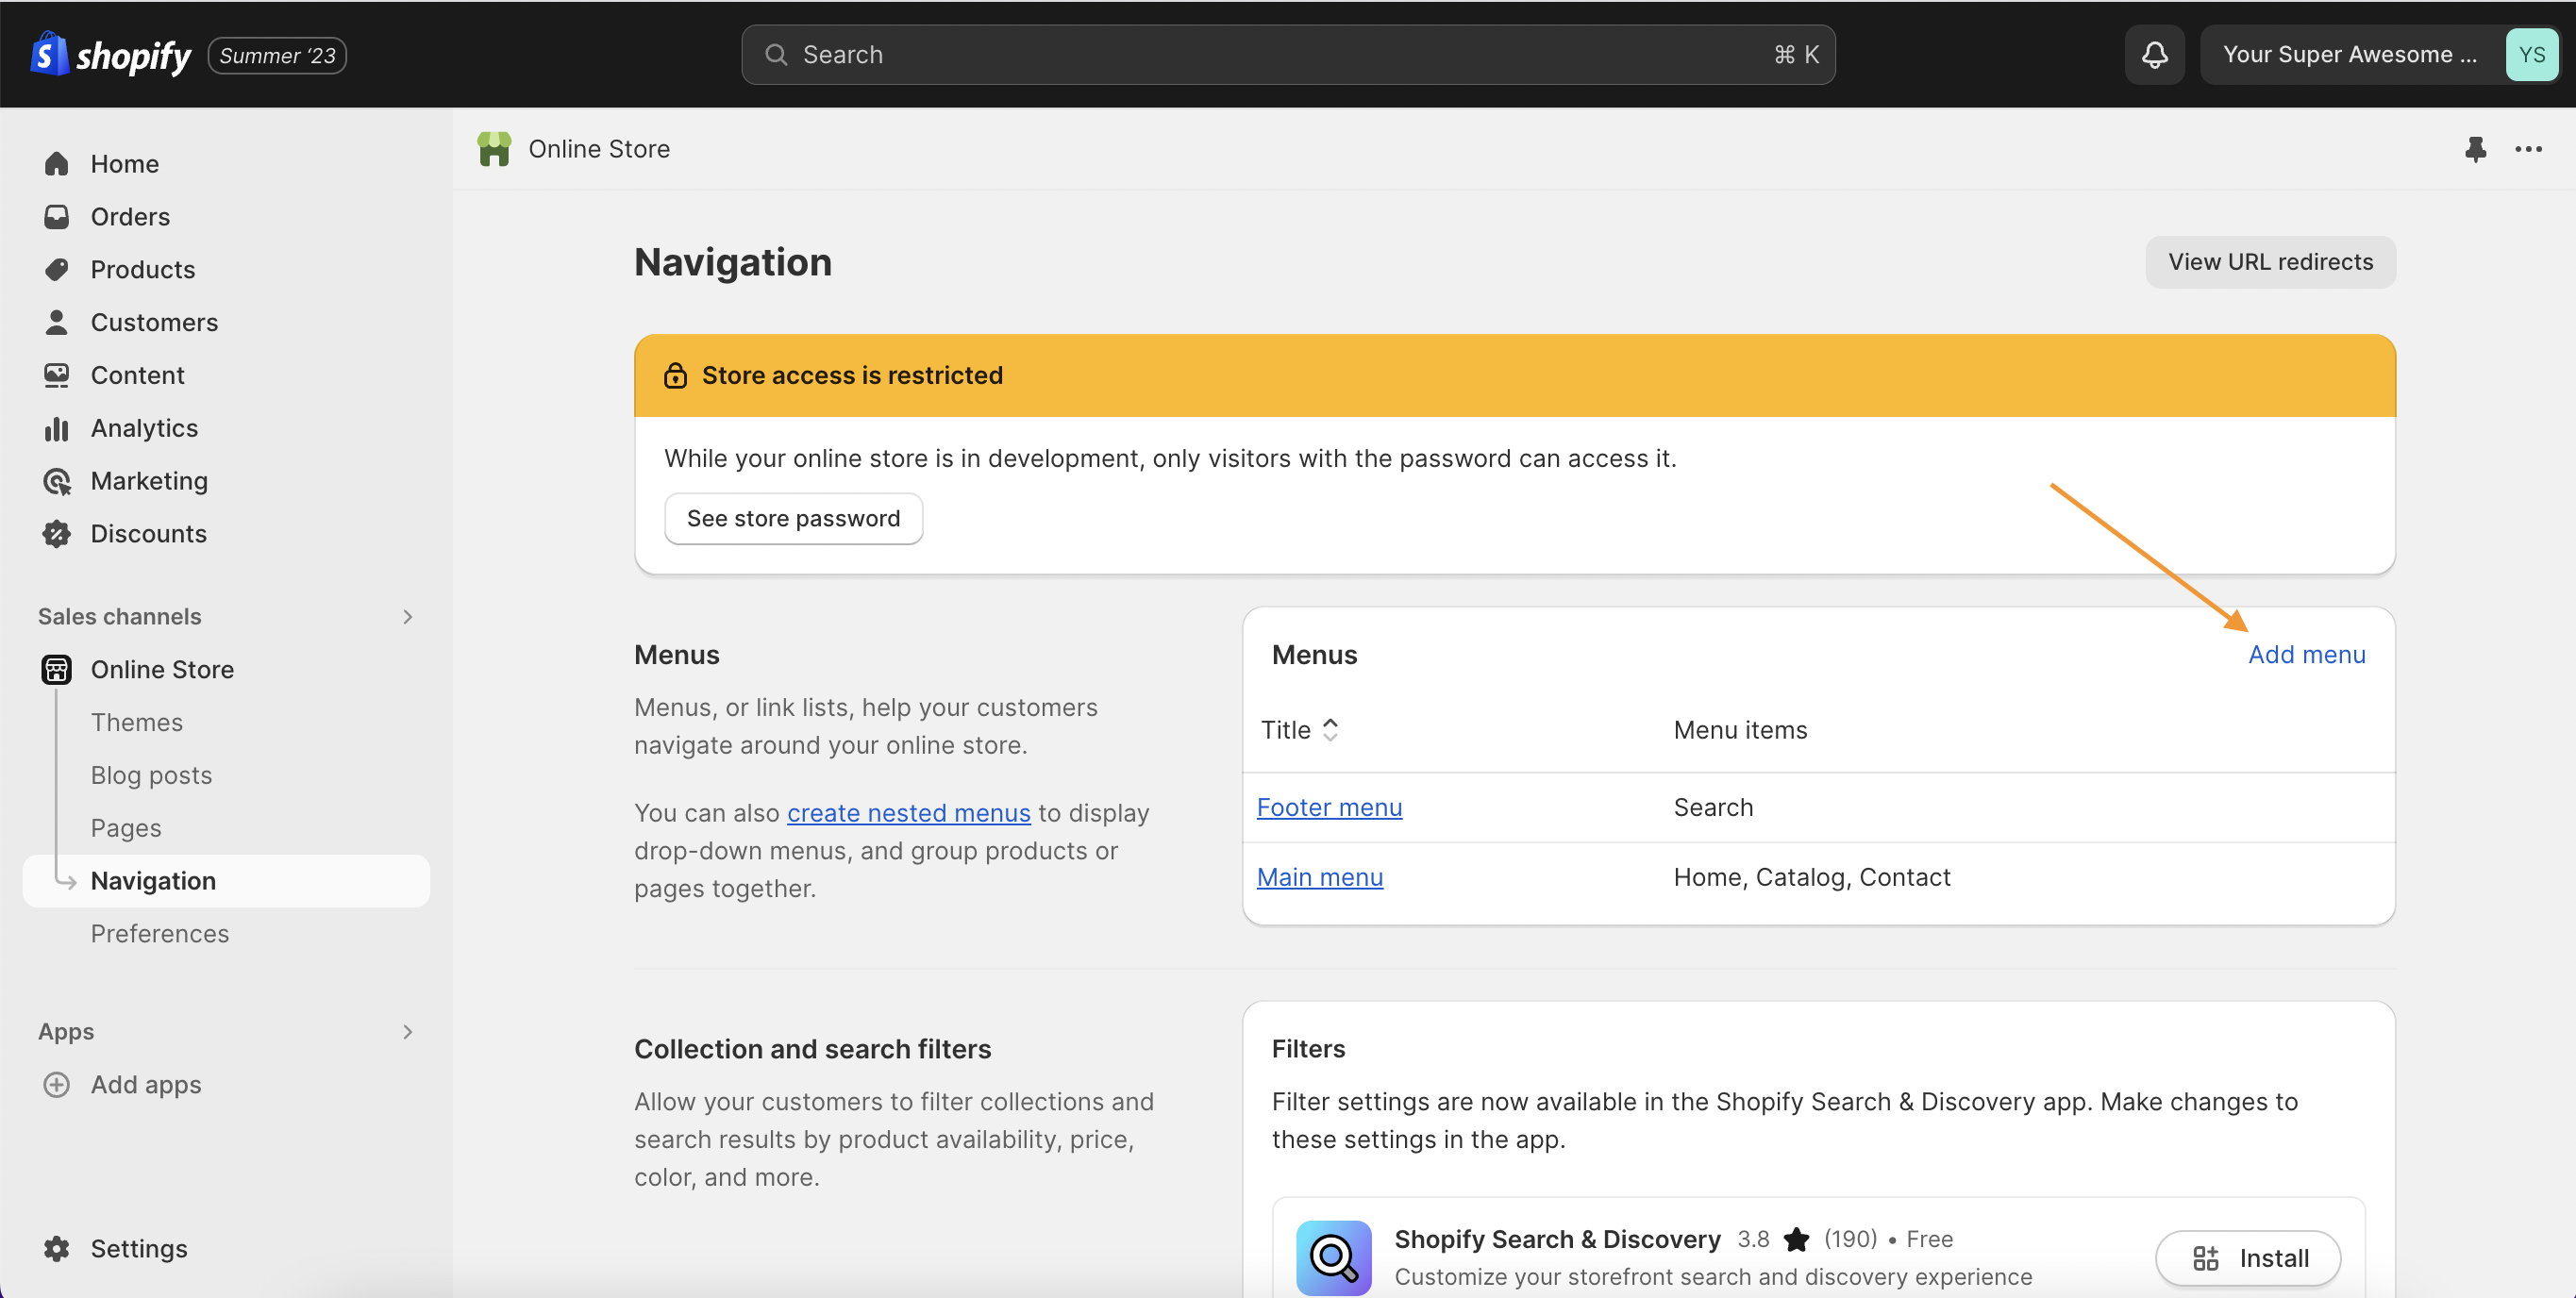
Step 1: Go to the navigation section
After you're logged into your Shopify admin, head over to the "Online Store" tab situated on the left sidebar. When the dropdown menu appears, select the "Navigation" option.
Step 2: Choose the menu to edit
Shopify typically provides two main menus: one is the main menu, and the other is the footer menu. In this guide, we're focusing on setting up the main menu. Click on its title to access the editing page.
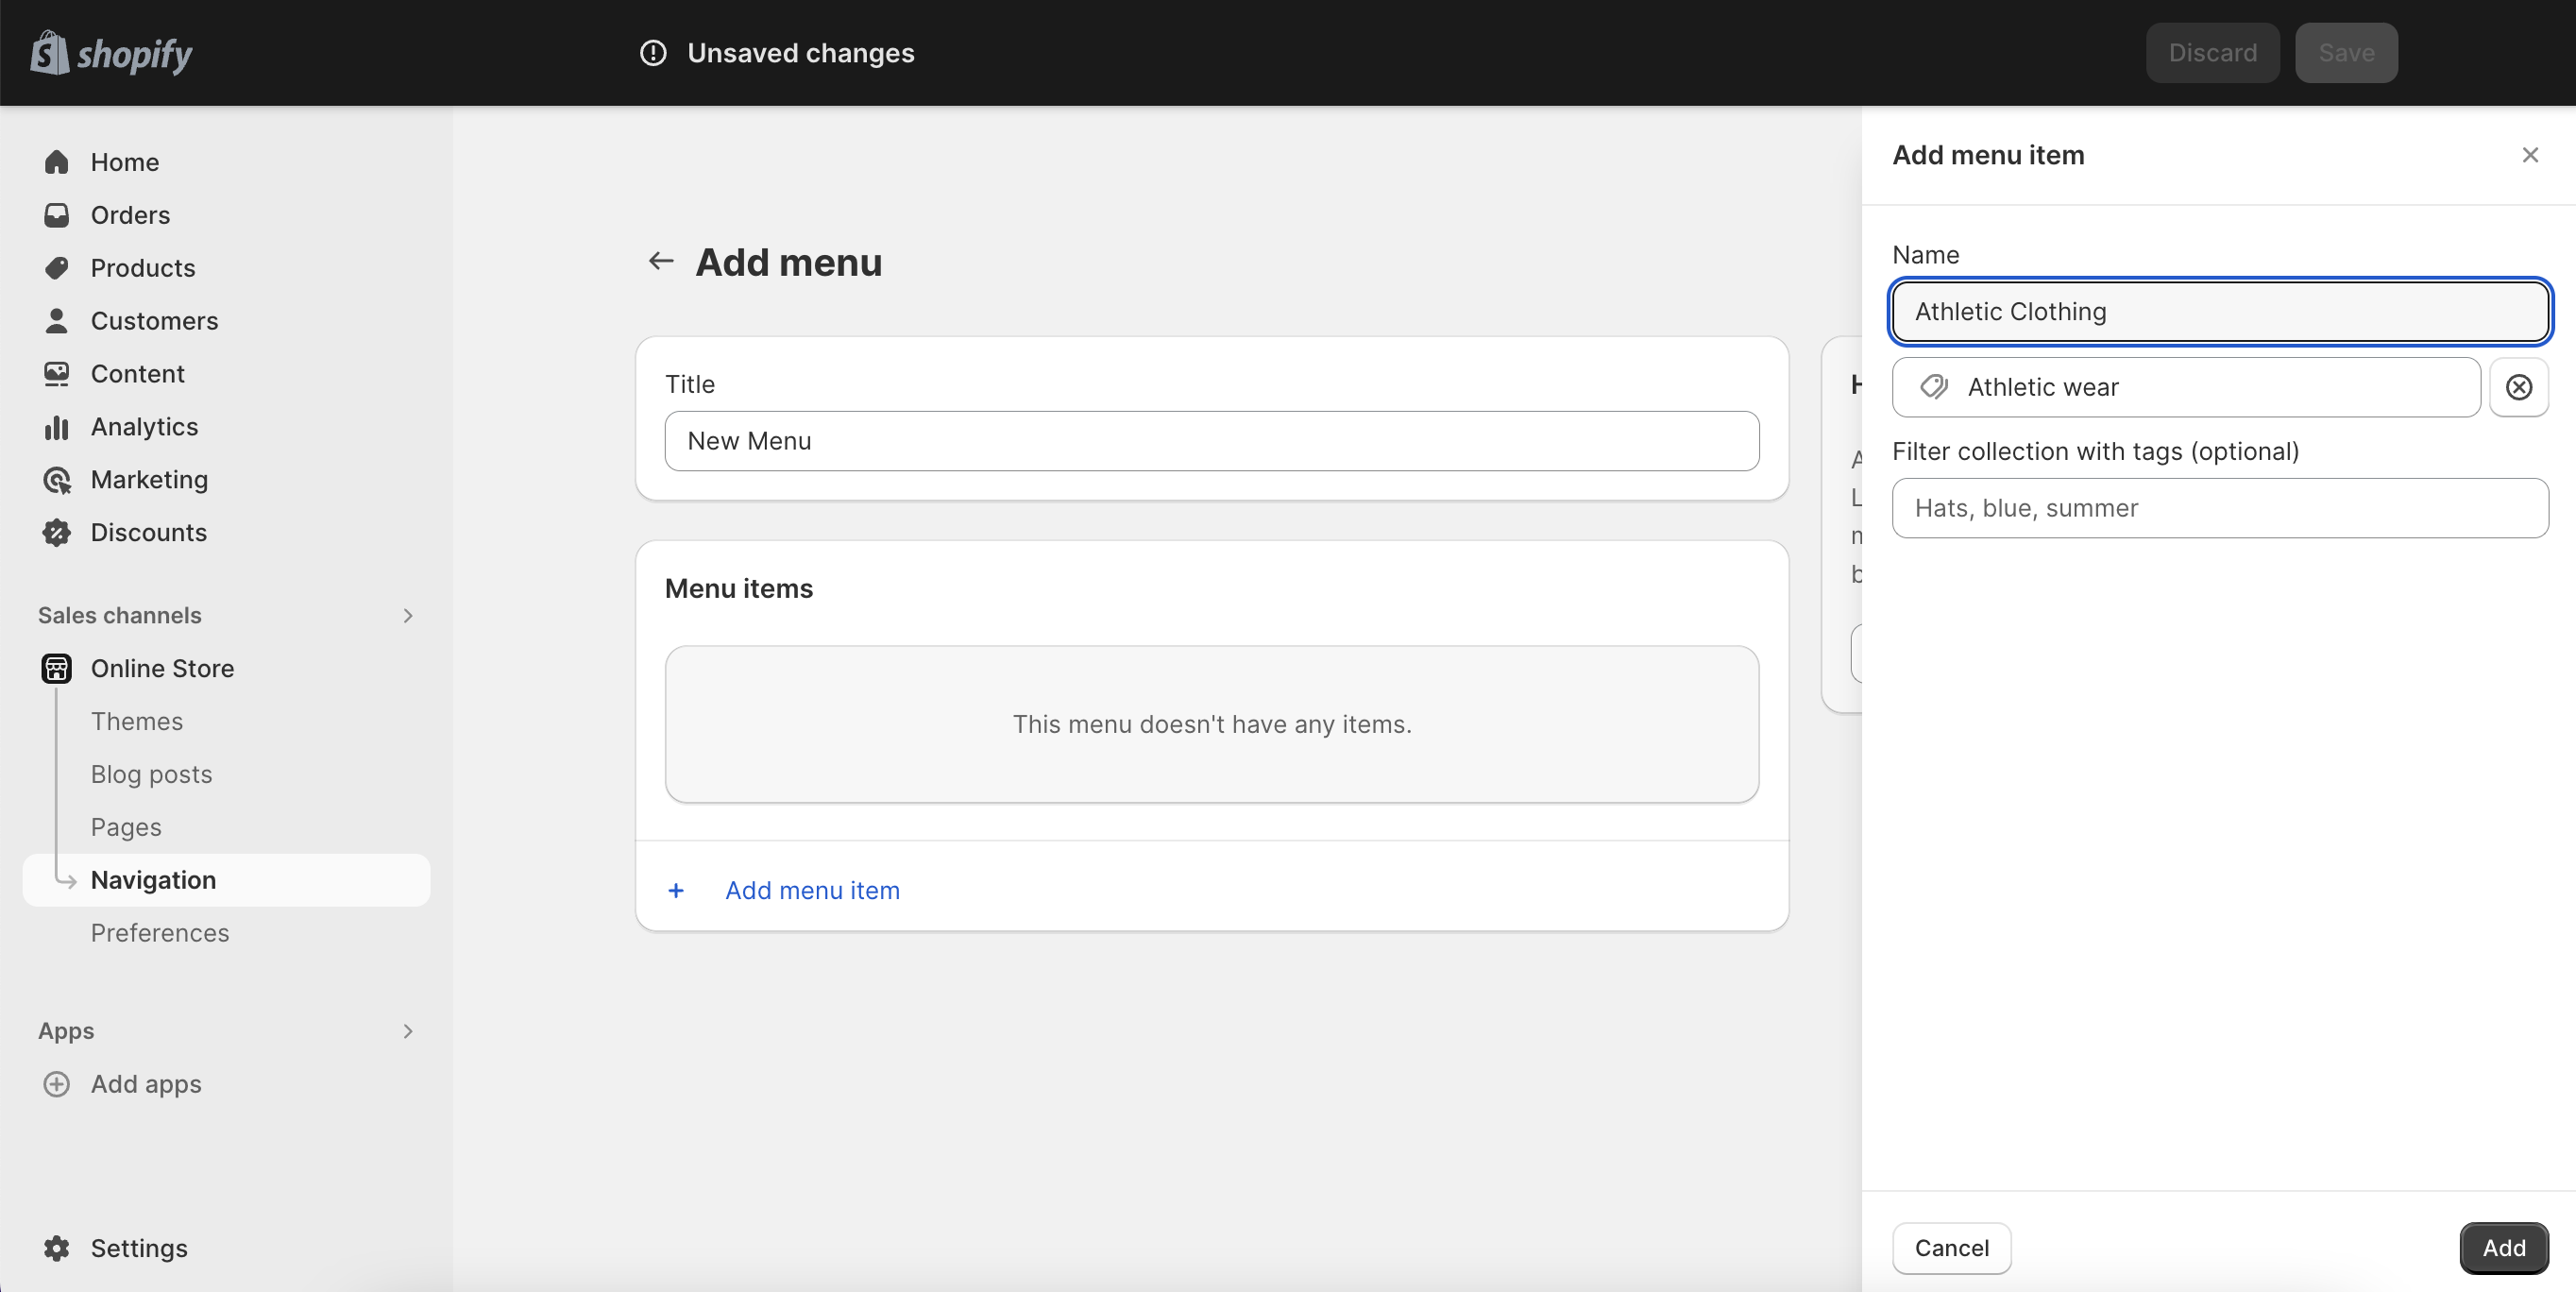
Step 3: Add a new menu item
Once you're on the main menu editing page, look for a button that says "Add Menu Item" and click on it.
Step 4: Name your menu item
A dialog box will show up, prompting you to enter a name in the "Name" field. This is what will appear in your navigation menu. It could be something specific to your product categories like "Shop by Category," "Apparel," "Electronics," and so on.
Step 5: Link the menu item to a collection
Still in the same dialog box, you'll find a "Link" field. Click on it, and a dropdown menu will appear. Navigate to "Collections" and select the category (or collection) you want this menu item to link to.
Step 6: Add nested menu items (Optional)
If you'd like to create a dropdown menu under your main category, you can do that by clicking "Add Menu Item" once more and then repeating steps 4 and 5. Once you've added the new menu item, you can drag it to nest it under your main category. Feel free to add multiple nested items to create a multi-level dropdown menu.
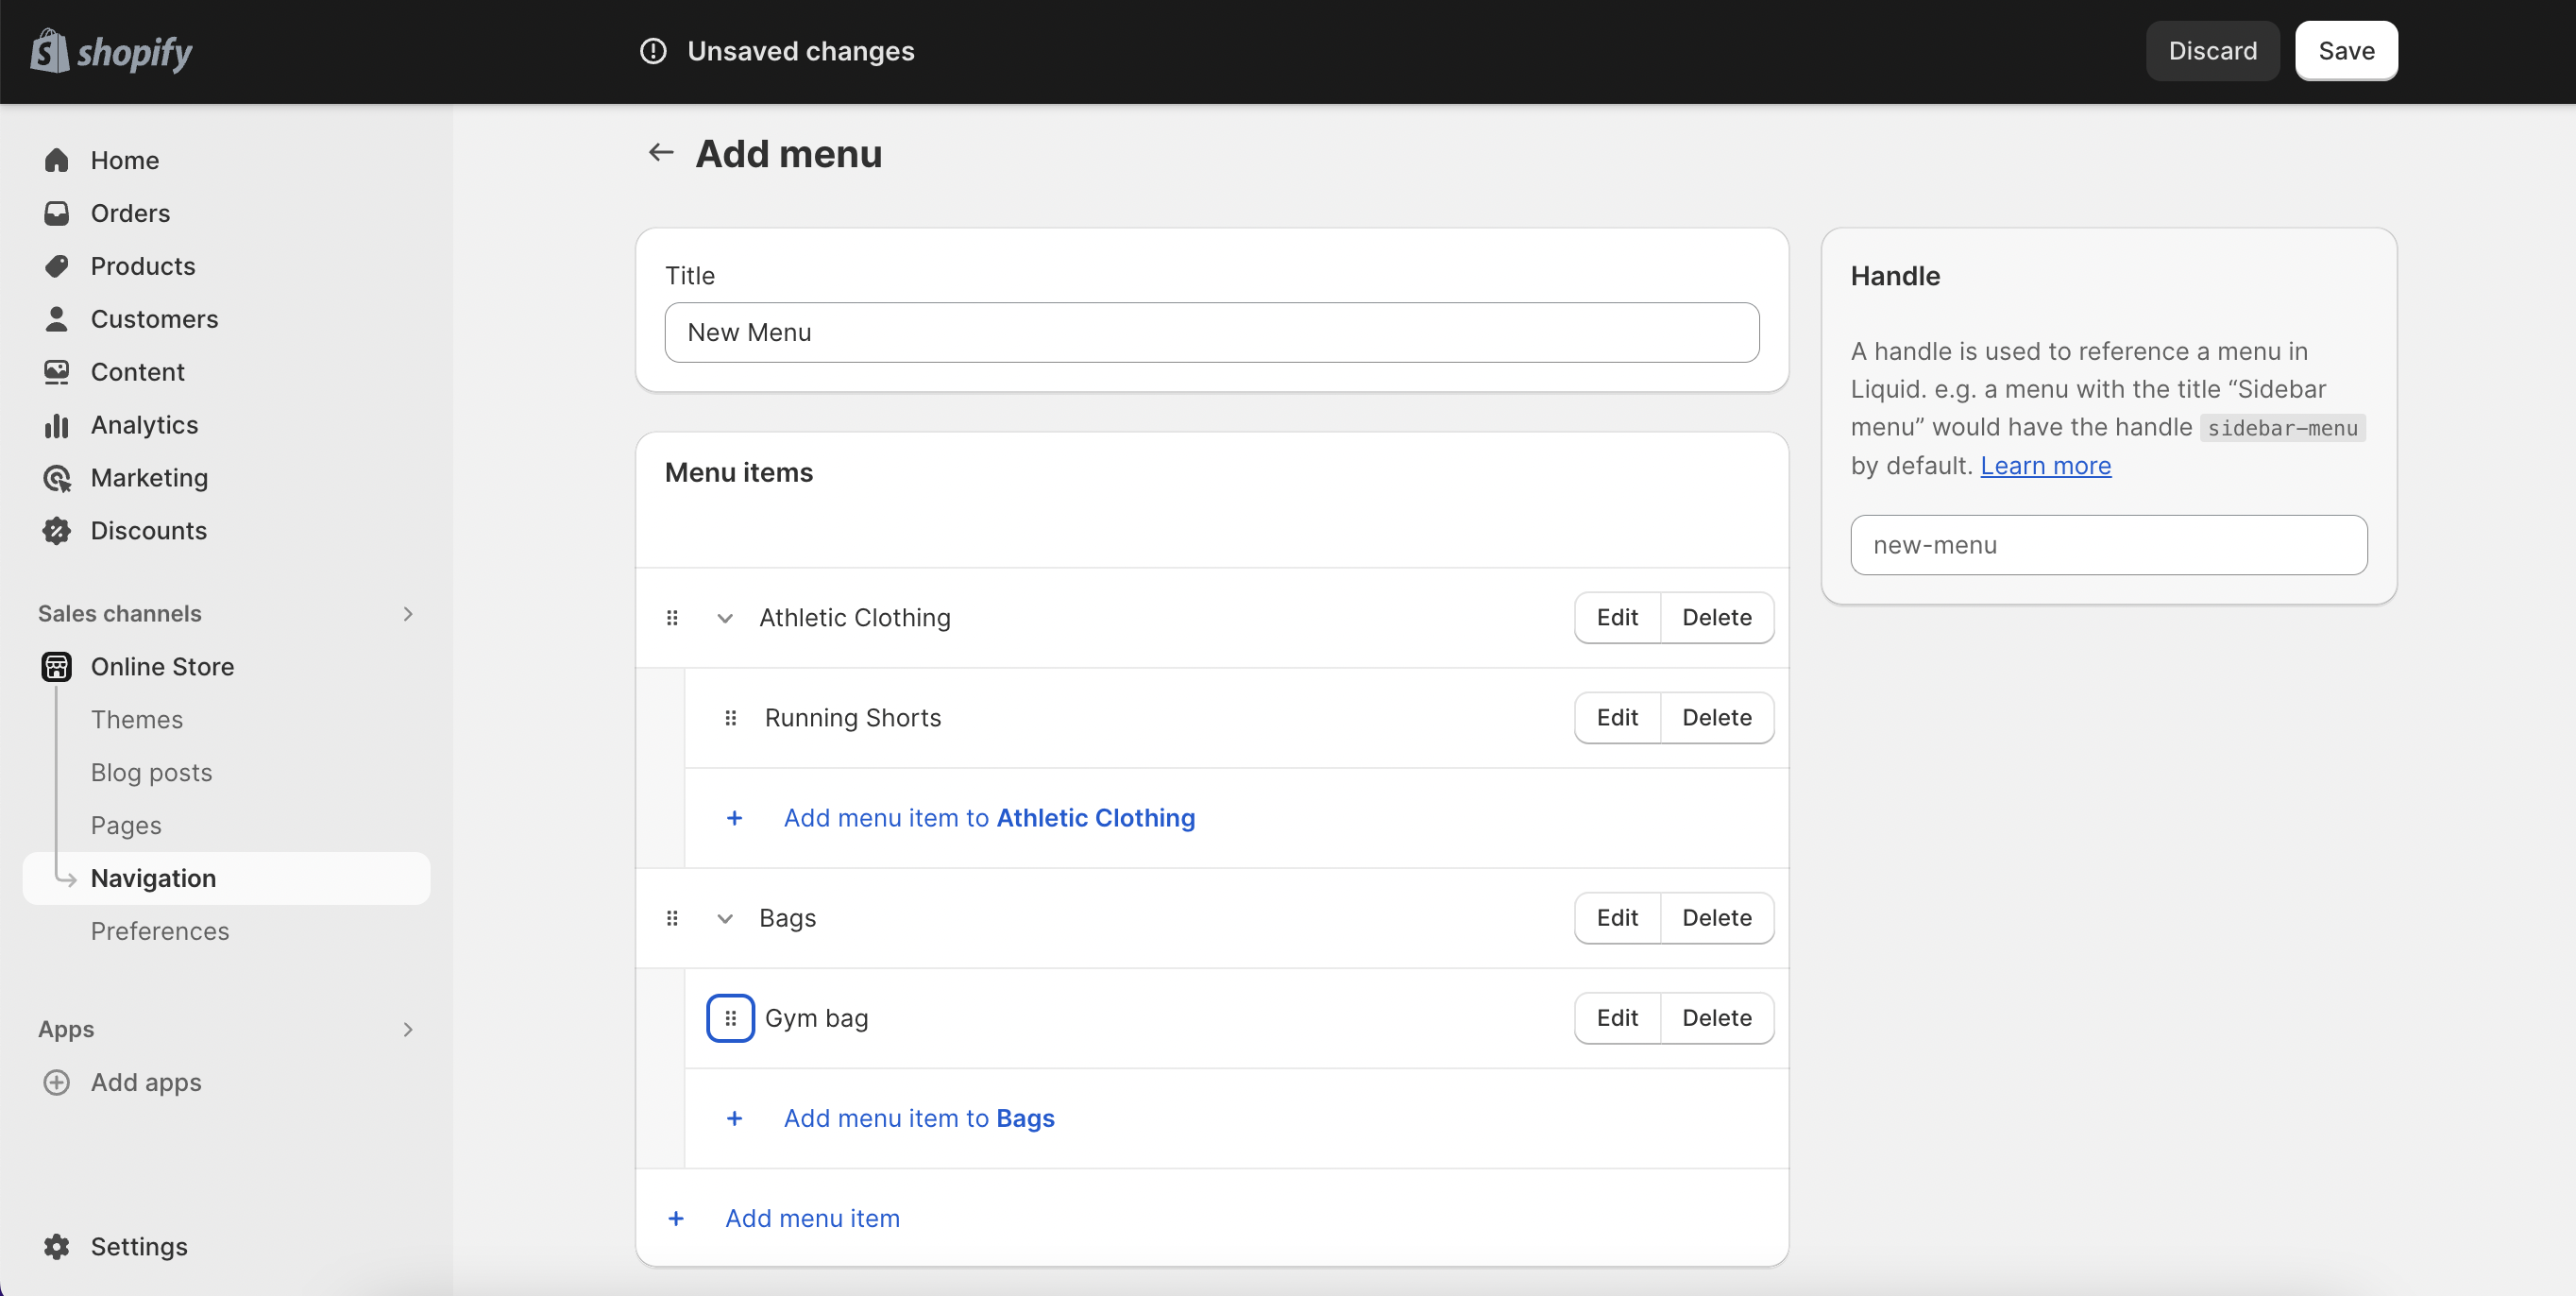
Step 7: Save your changes
This step is crucial. Once you've arranged your menu items to your liking, don't forget to click the "Save" button. You'll find this either at the top or bottom of the page.
Step 8: Preview your store
After saving your changes, it's a good practice to preview your store. This allows you to see if the navigation menu appears and functions as you intended.
Step 9: Make adjustments if needed
If something doesn't look or feel right, don't worry. You can always go back to the navigation section and tweak your menu items. Just remember to save your changes after making any adjustments.
Optimizing for Conversion: The Sweet Spot
Here's where the rubber meets the road. To optimize for conversions, consider implementing the following:
Use Descriptive, SEO-Friendly Titles and Descriptions
One of the first things to consider when optimizing your product categories is the SEO aspect. Search engines love descriptive, keyword-rich titles and descriptions. A vague title like "Items" won't do you any favors; instead, opt for something more descriptive and relevant to your products, such as "Designer Handbags" or "Organic Skincare Products." These not only improve your SEO but also help customers understand what to expect in each category.
Leverage High-Quality Imagery
The visual appeal of your category pages can significantly influence user engagement. Use high-quality, relevant images for your category headers. This provides visual cues to your visitors about what kind of products they can expect in each category, making it easier for them to navigate through your store.
Simplify Navigation with Subcategories
A well-structured, hierarchical navigation system can enhance the user experience substantially. For stores with a wide range of products, using subcategories can be a game-changer. For example, under a category like "Footwear," you could have subcategories such as "Sports Shoes," "Casual Shoes," and "Sandals." This granular approach makes it easier for customers to find exactly what they’re looking for without sifting through an ocean of unrelated products.
Limit the Number of Categories and Subcategories
While it might be tempting to create categories for every possible niche of products you offer, this can backfire by overwhelming the customer. According to Hick’s Law, the time it takes for an individual to make a decision increases with the number and complexity of choices. Keep your categories and subcategories to a reasonable number to avoid decision paralysis.
Utilize Featured Products
A neat trick to guide customer attention is to highlight featured products in each category. This not only showcases your bestsellers but also provides an additional layer of guidance to consumers. A well-placed, best-selling product can serve as a gateway to the broader category.
Incorporate User Reviews and Ratings
Trust is a big factor in the customer's decision-making process. Including user reviews and ratings within categories can significantly boost credibility and encourage purchases. Reviews provide social proof and can be the tipping point for a customer contemplating a purchase.
Implement a 'Sort By' Function
A 'Sort By' function allows customers to tailor their shopping experience according to their preferences. Options like "Price: Low to High," "Best Selling," and "Customer Reviews" offer the customer control over their browsing experience, which can be particularly beneficial for larger stores with an extensive range of products.
Use Clear and Easy-to-Read Fonts
Typography plays an often-underestimated role in user experience. The text should be easy to read and understand. Choose fonts and text sizes that are mobile-friendly and appealing to the eye. Hard-to-read fonts can be an unnecessary roadblock on the path to purchase.
Monitor and Adjust
Last but not least, consistently monitor the performance of your categories. Use analytics tools to track metrics like click-through rates, time spent on the page, and conversion rates. If a category is underperforming, take it as a sign that adjustments are needed. This could mean revisiting your SEO strategy, improving imagery, or simplifying navigation.
Optimizing your product categories is an ongoing process. As your product range grows and consumer behaviors evolve, your categories should adapt accordingly. Keeping these tips in mind will help you create a more intuitive, engaging, and conversion-optimized category structure for your Shopify store.
Wrapping Up
The key to conversions lies in the subtleties. Something as simple as optimizing your product categories can spell the difference between a thriving Shopify store and one that’s merely surviving. So why not give it a try? You’ve got everything to gain and nothing to lose.

Bergen Palmer
Bergen Palmer is a content marketer at Plytix, where she writes all about product information and ecommerce. With a background in ecommerce SaaS and content strategy, she focuses on creating clear, trustworthy content that helps brands work better with their product data.
What if your product data actually worked for you?
We’ll show you how Plytix helps you stop fixing data—and start using it.

Think others should see this?
Go ahead and share it.