Online shoppers don’t have the luxury of touching and trying on a product, so they want to learn everything they possibly can before deciding whether to buy it. And, while product descriptions can give them the information they need about the material used, size, and more, ecommerce product photography goes a long way in helping give customers the experience they really crave.
Ecommerce product photography gives them a visual explanation of what a product is and what it’s used for. But just having product photos is not enough; they have to be:
- High quality
- Provide a customer with an accurate story of what the product is
- Answer the question of what the product does
- Help the customer visualize themselves using the product
The best way to make sure you give your customers the type of photos they want to see when shopping is by making sure you read these product photography tips.
Why is product photography important?
According to this article, 75% of online shoppers rely on ecommerce product photos to make a purchase decision. In addition, 90% rate the quality of the product photo as the most important factor when deciding to purchase.
Further research has found that 33.16% prefer to see multiple photos of the same product, and a Weebly study revealed that 22% of online product returns are because the ordered items look different than in the pictures.
If these numbers tell us anything, it’s that customers are looking for authenticity and trust. They want product images that accurately represent your product for what it truly is. That way, they can be confident in their decision to buy the product.
Effective product photos can create that impact. But many businesses getting started with product photography begin with the first question: Can I use my smartphone for product photography? The short answer is yes, you can. Today’s smartphones are equipped with high-quality camera features, so they can be the best camera option for product photography. That means if you’re using the latest IOS or Android smartphone, you can get the job done without emptying your pockets on a DSLR camera.
So now that you know you don’t need to buy a professional camera to create high-quality photos, let’s get into how to take a good product photo to influence better engagement and conversions. Regardless of your industry (whether you’re in apparel, furniture, hardware, or another industry), we’ve got some product photography tips that will help answer that question.
How to take good product photos
Now that you know the why, let’s dive into the how. Below are the 7 top tips on how to take product photos.
1. Decide on the type of product photography
There are different types of product photography to choose from. You have these options to consider;
- Product-only photos
- Context-based or lifestyle photos
Product-only photos are taken against a single-color background (white is typically the recommended color) and can either be an individual, a group, or a packaging shot. This choice is best when looking to showcase your products without any distractions.
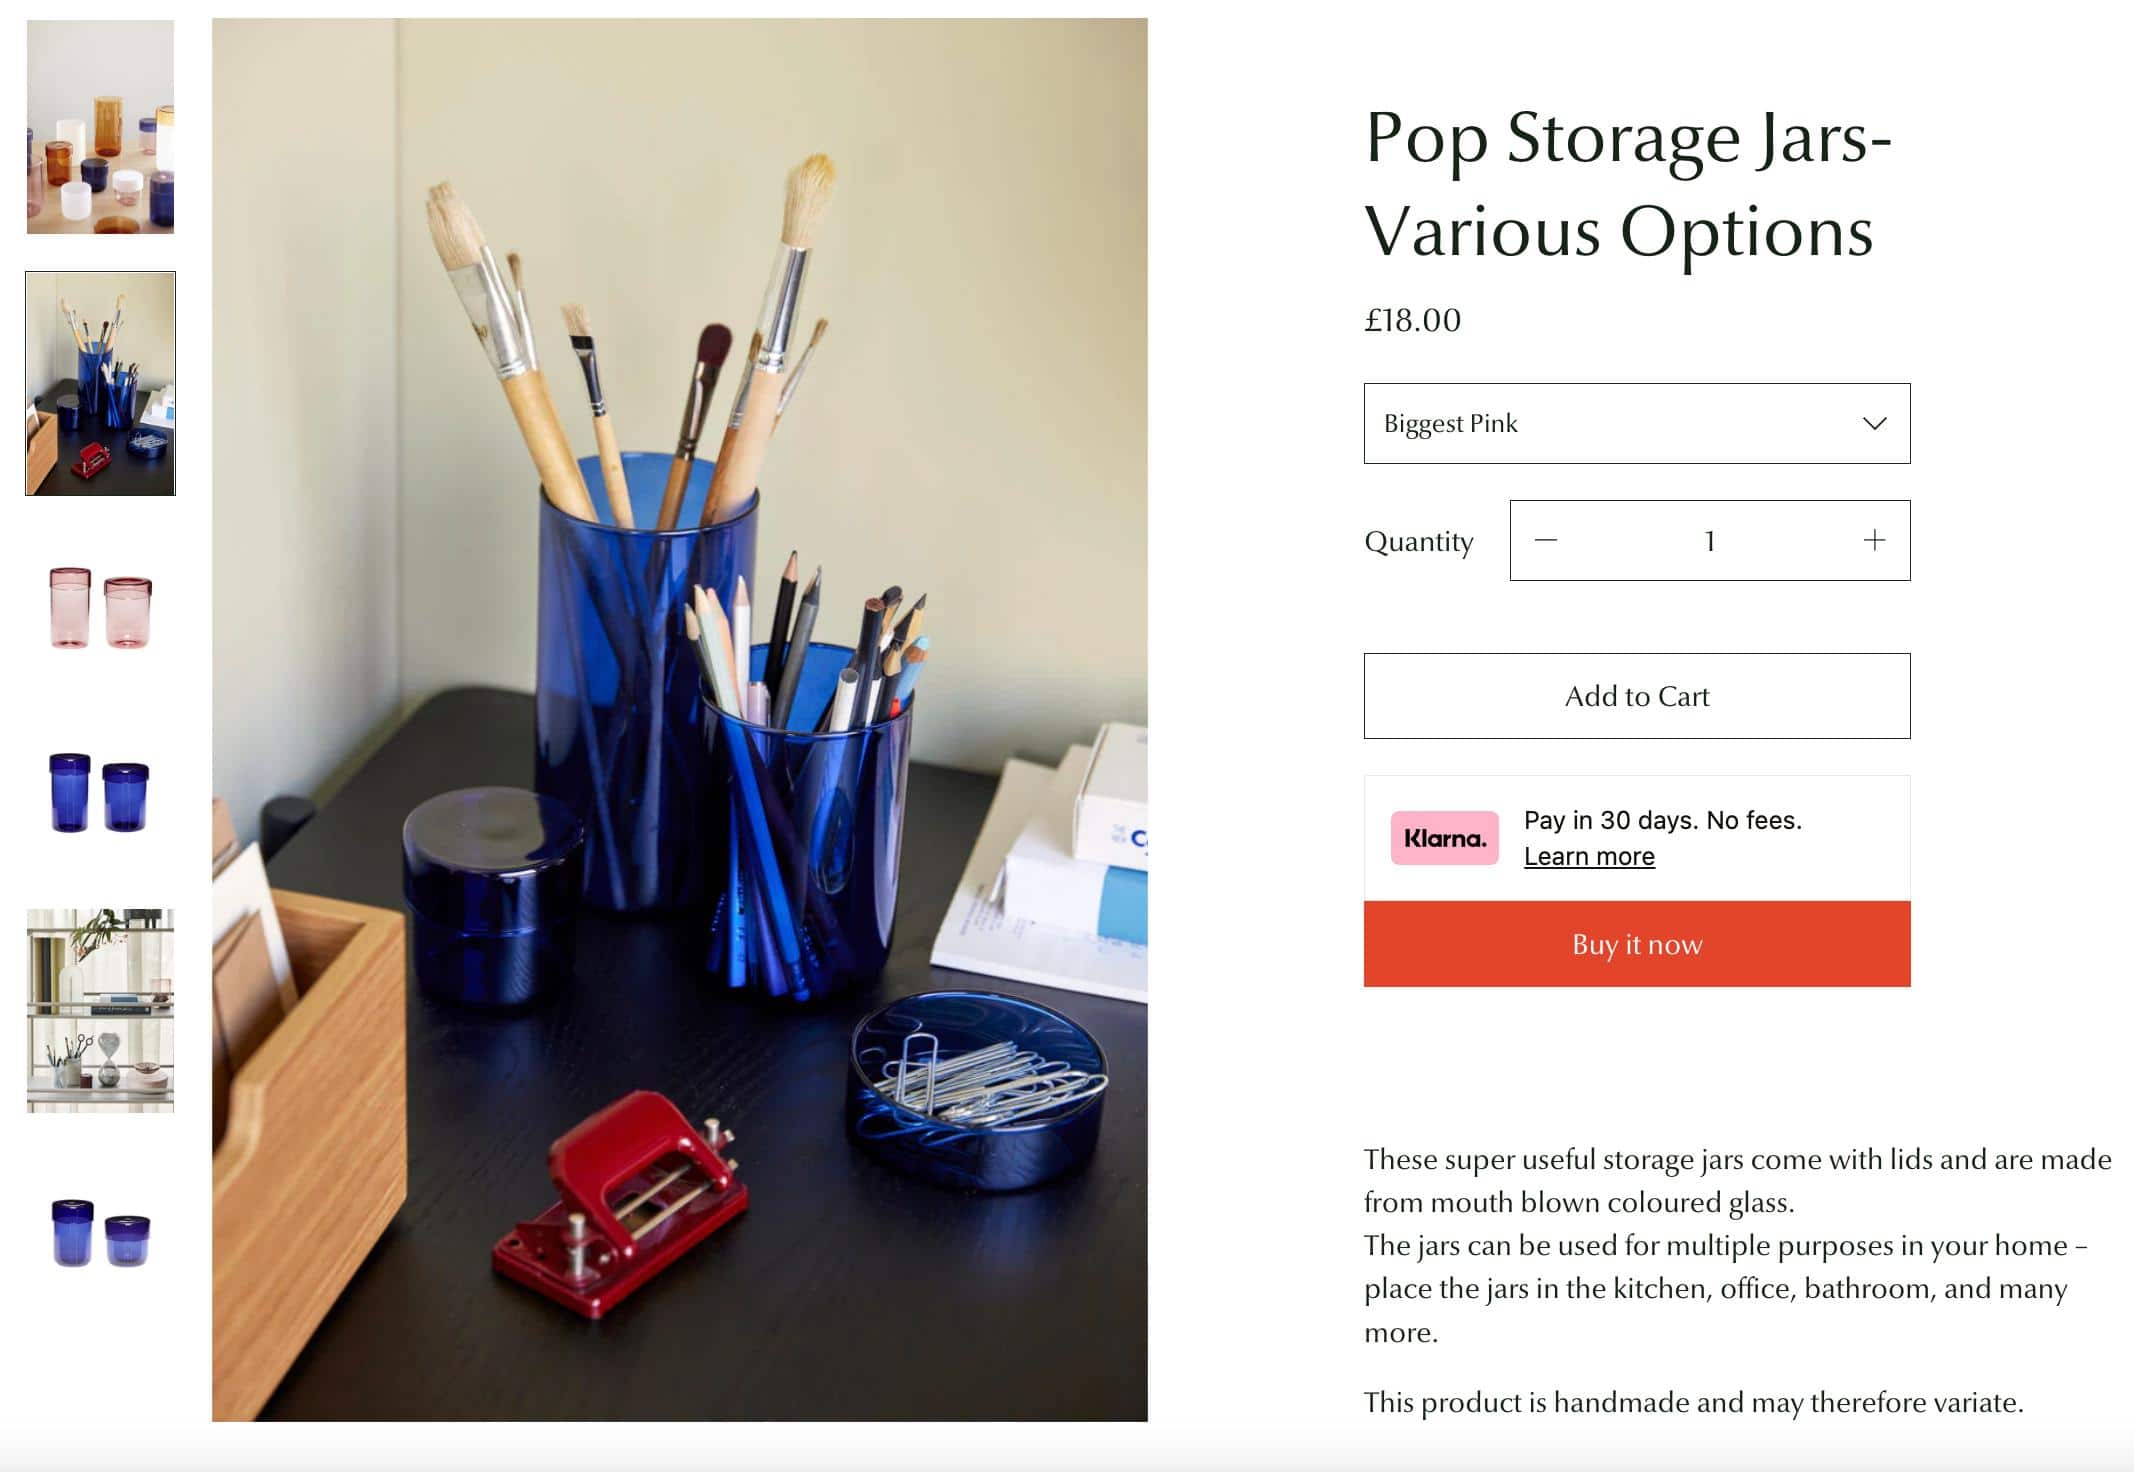
On the other hand, context-based or lifestyle photos are a perfect choice when you want to showcase your product in action. Say you’re selling homeware items; for instance, you can use context-based images to show how those products would be used at home. This creates a home setting and a sense of desire which helps customers visualize how they would use your product.
A great example would be the context-based photos by Dowse Design.
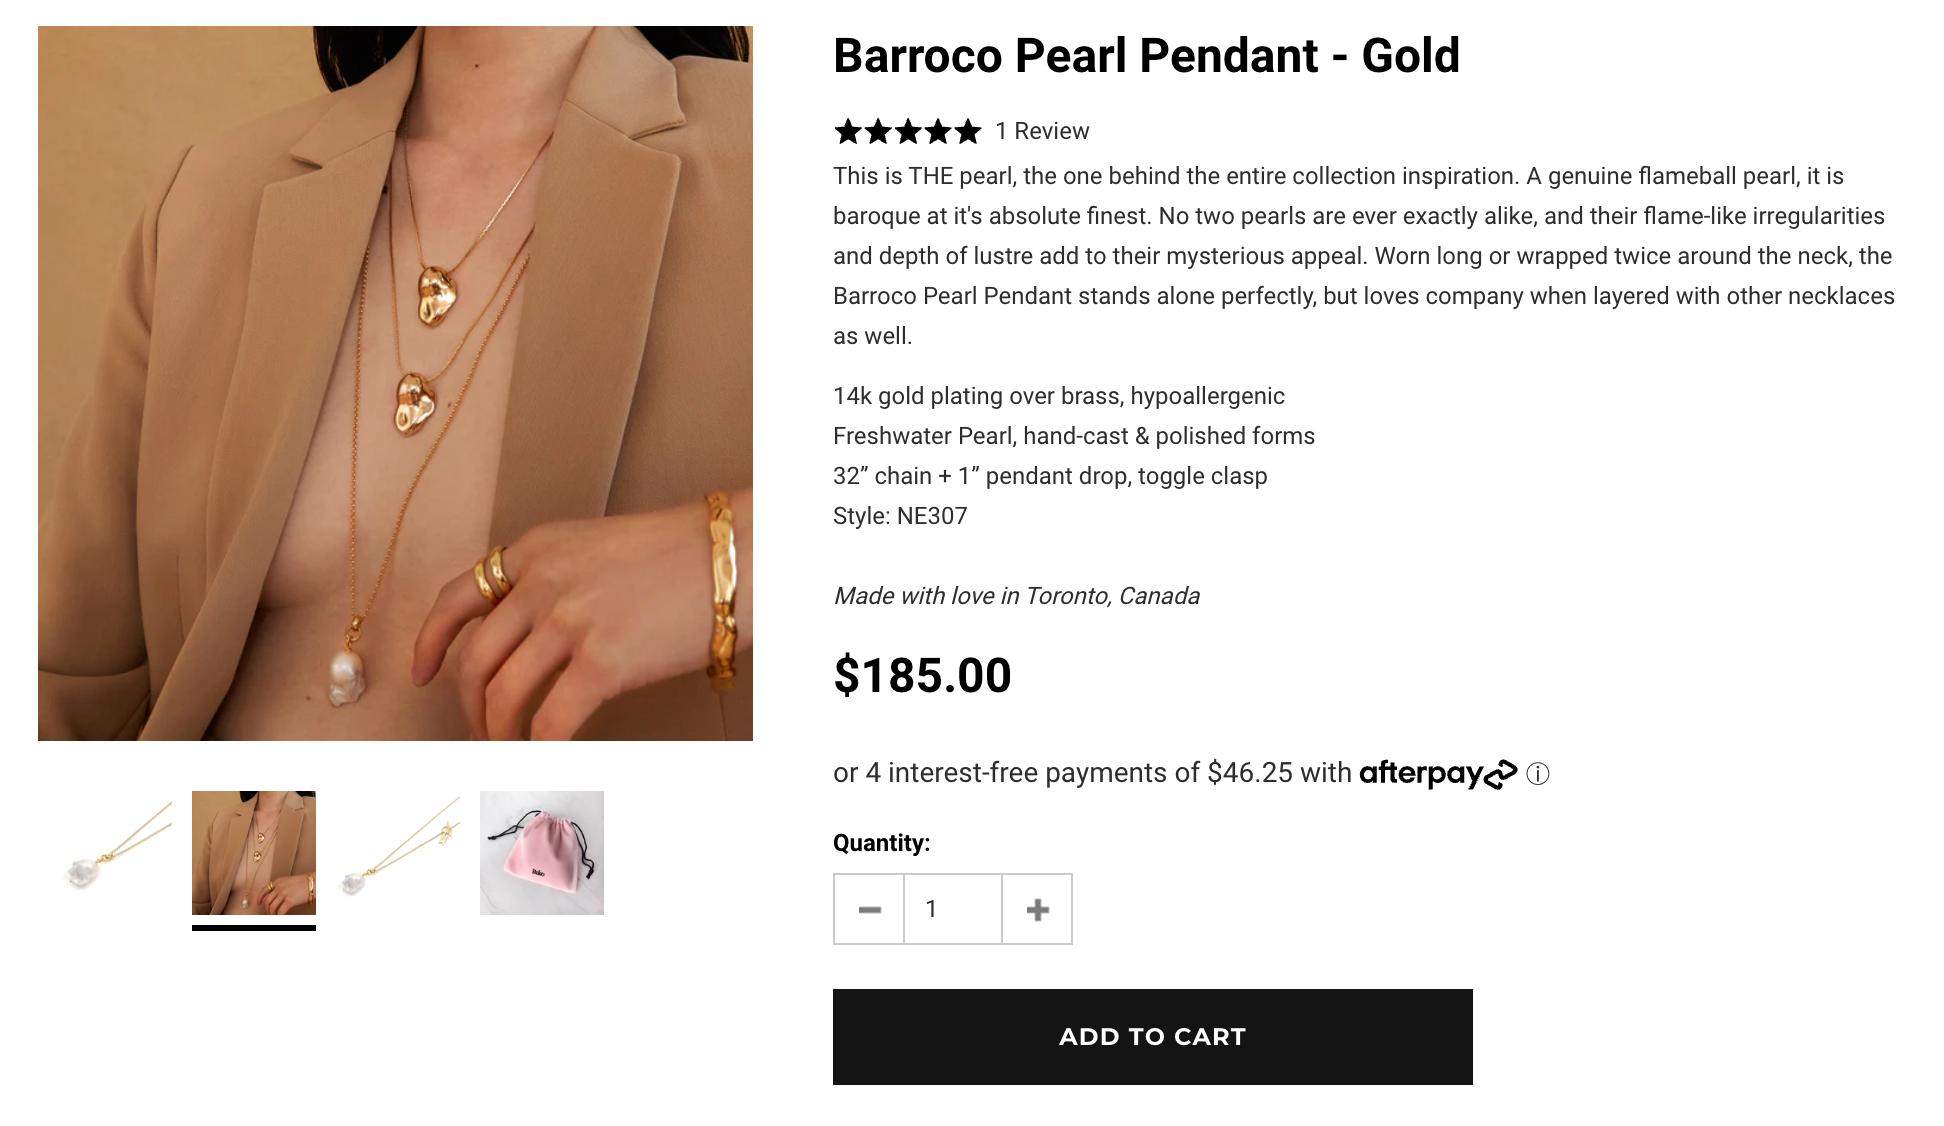
The same can be said for jewelry items. Lifestyle shots of these items provide customers with a clear idea of how they would use (or wear) them in their daily lives as well as how to properly style the items. Biko is a great example to use as a reference. The brand uses both product-only and context-based images and showcases the product from different angles so you can get a full picture of it.
2. Take high-quality product photos
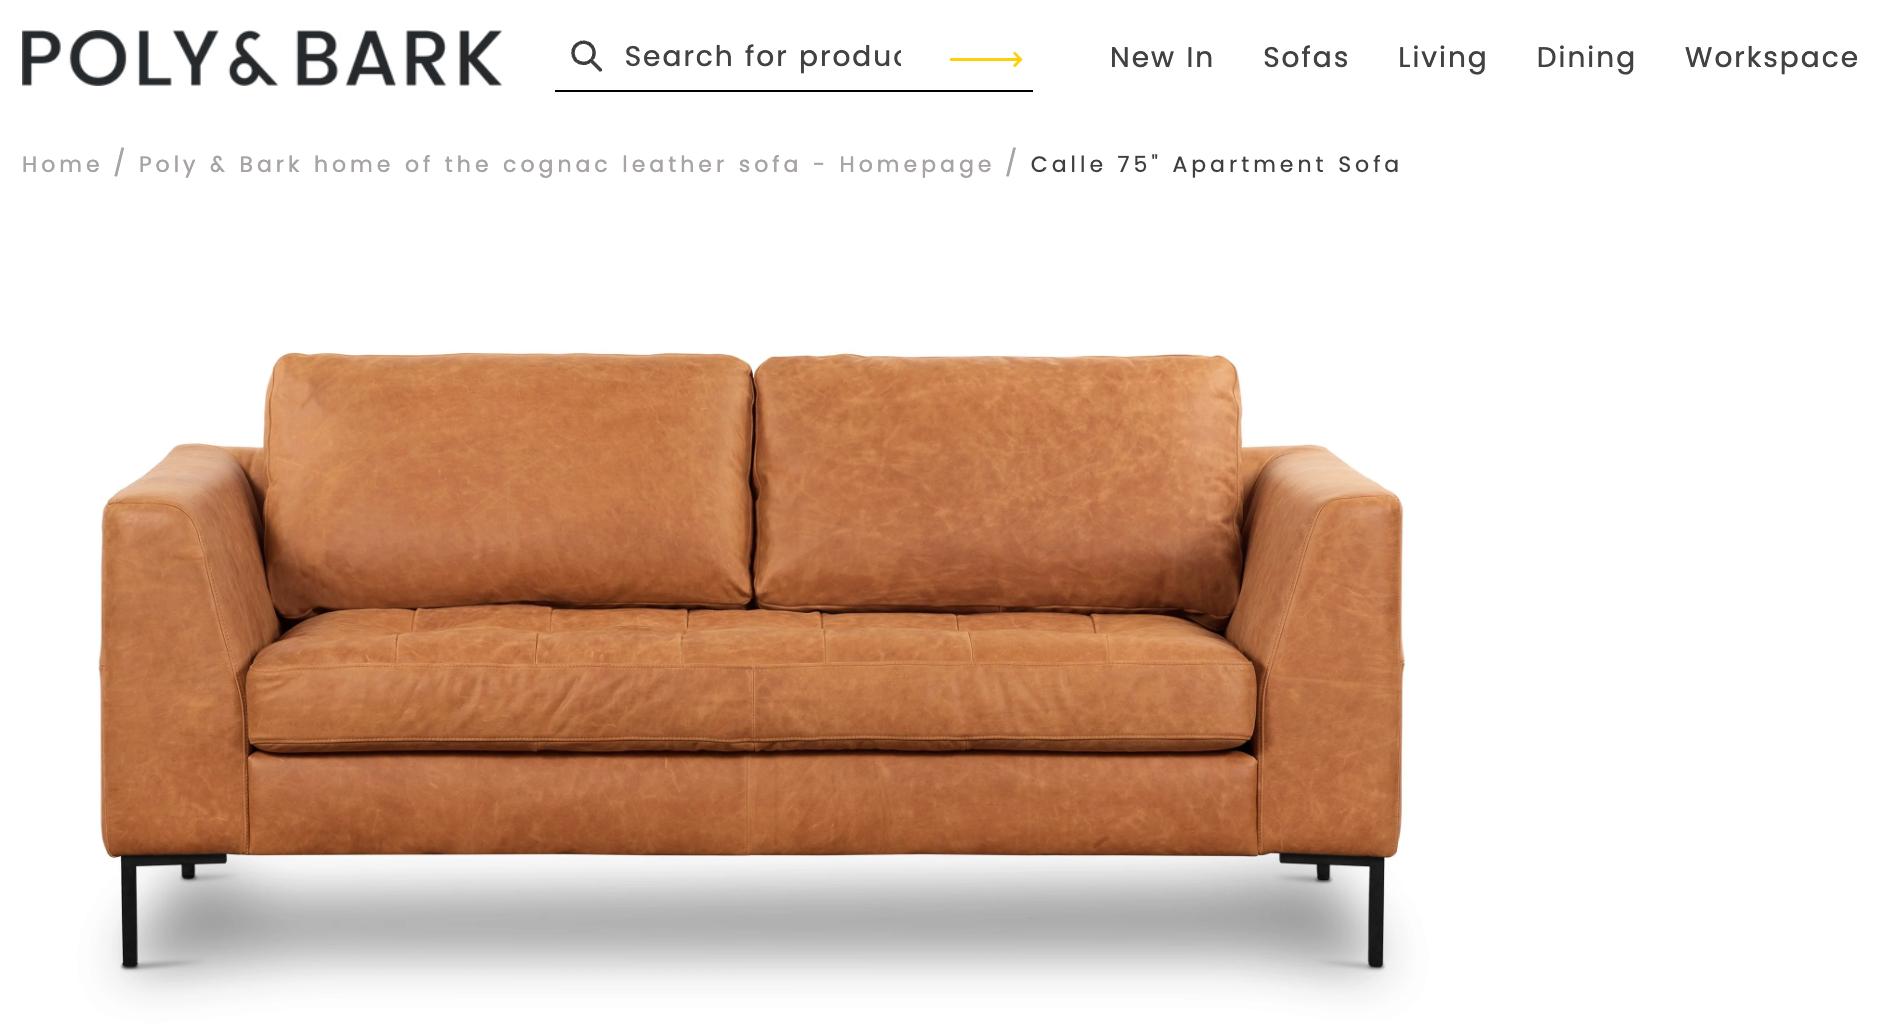
As mentioned above, customers cite high-quality photos as an essential component of their buying decision. Okay, but what makes a product photo quality? It’s all in the resolution! The higher the resolution, the higher the quality. The difference between a hi-res photo and a low-res photo is that the former will look clear and sharp, while the latter will look blurry and pixelated (and what customer would take a pixelated photo seriously? None).
So, taking hi-res photos to your webshop or product listings means you’re putting out high-quality photos that will guarantee a positive perception from customers. Here’s an example of a quality photo from the furniture brand, Poly & Bark.
3. Take multiple angles of the same product
When customers are physically in a brick-and-mortar shop, they pick up a product and turn it around at different angles to see the product in full. This is an experience they crave in the online shopping space, and the way to provide it for them is through multiple-angle shots of the same product.
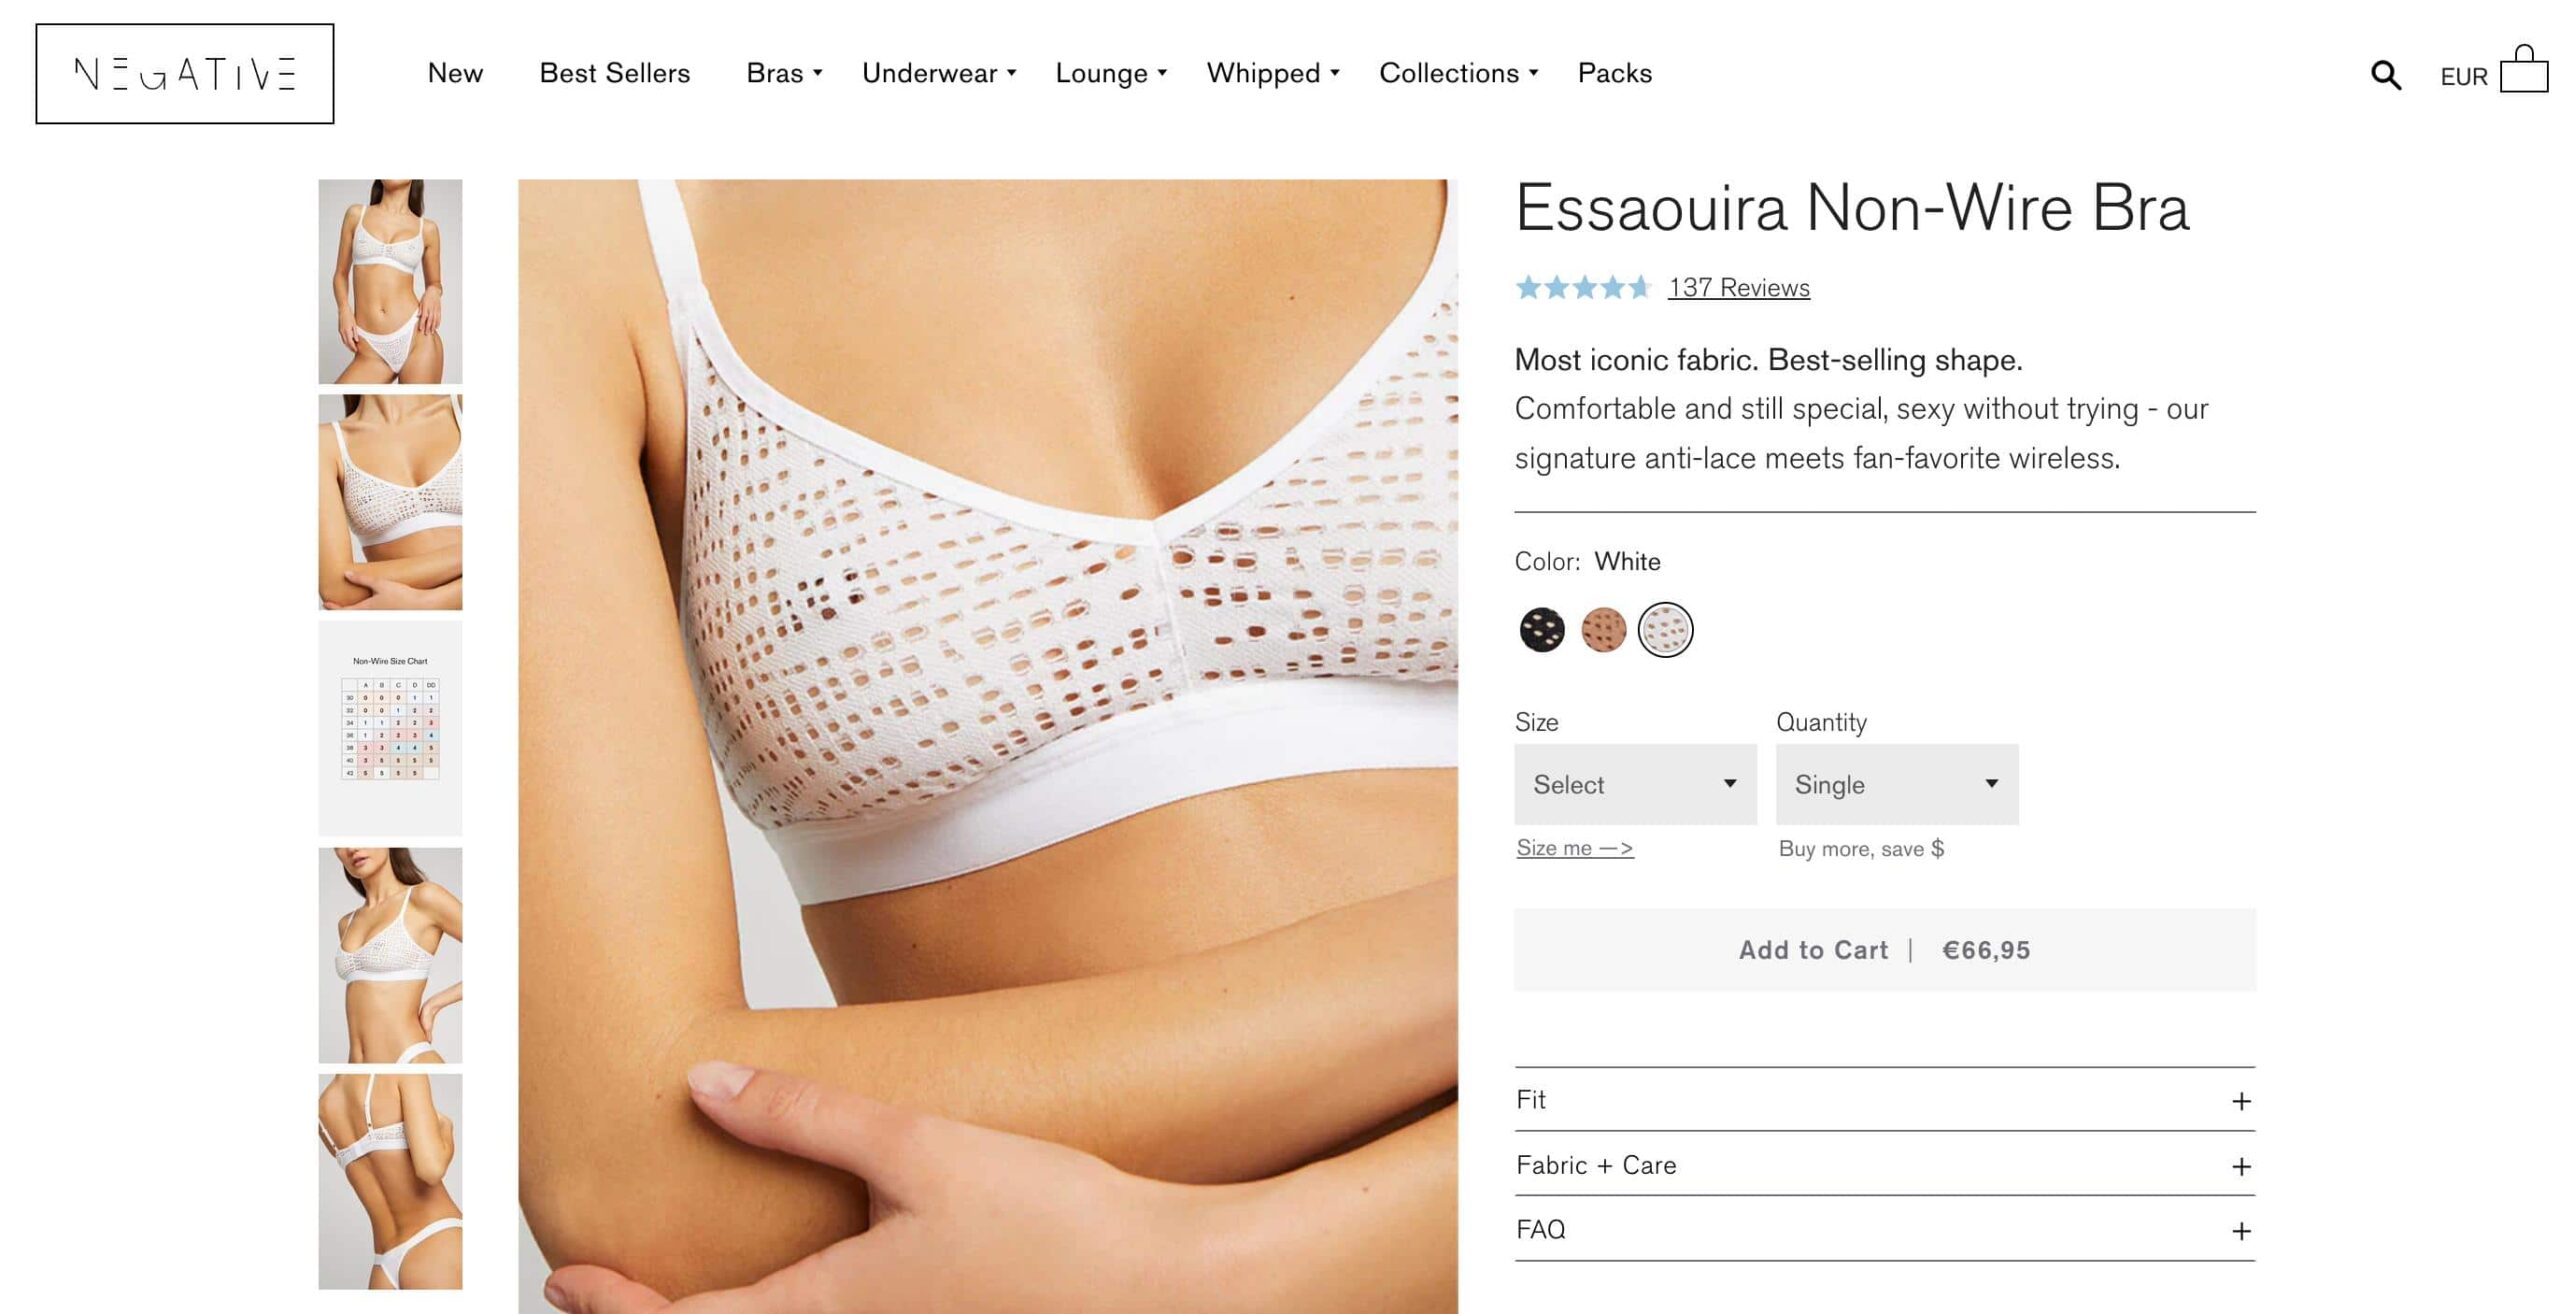
That means taking photos of the back, front, top, bottom, and all sides. For example, if you’re selling clothing items, you want to capture a 360-degree view with details from all angles.
Fashion brand Negative Underwear excels in taking shots from multiple angles.
4. Use a tripod
Whether you’ve got a premium or a standard camera, balance will be the key determining factor in how the images turn out. Losing even a little balance while taking a picture can impact the result of your images. We’re talking blurry photos with no clean and sharp look. So, getting a tripod to keep the camera still while taking product photos will make all the difference. Even if you’re using a smartphone with excellent camera capabilities, you can trust a tripod to keep the phone steady while taking a product image. Luckily, you can find quality tripods at affordable prices if you’re working on a tight budget.
5. Choose the best lighting option
Product photography lighting is a determining factor in whether you get a good product photo or not, and according to BLB, that also applies to smartphone cameras. You have the choice of using a natural light source or studio lighting. The option you choose depends on the products and the type of product photography you’re taking. Natural lighting is free, but sometimes it’s hard to come by.
For example, the weather, season, time of the day, and the quality of light in the space you’re planning to take the images from. You can work around all of these challenges, of course, but studio lighting offers you the freedom to take images anytime, in any weather or season, no matter how dark the room is.
Nowadays, you can use ring lights. They are portable and cost-effective alternatives to buying new studio lighting equipment. Amazon has decent ring lights that go for less than 60 dollars. Not to mention that they’re just as equipped to give you the lighting boost you need to take quality product shots.
Whatever option you choose, make sure that the color tone of the products looks as natural as possible and that there are softer shadows. If you end up with product shots with yellowish tones, your customers may not trust your products enough to buy them. And it’s almost impossible to edit hard shadows out of the picture. So, pay attention to the product photography setup as you take the shots. You can set up white covers such as curtains, paper, cardboard, or paperboard to soften the shadows.
6. Edit using a bigger screen
Speaking of editing, always use a bigger screen. Even if you use a smartphone to take the images, transfer them onto your computer or laptop for editing. This is because a smartphone has a small screen which opens up chances to miss important details. With a wider screen, you’re able to see everything clearly.
You can find tons of image editing software—some are free, while others you’ll need to pay for. These include Adobe Photoshop, Canva, GIMP, and Pixlr. You can use whatever software you think will work best for you and your editing abilities.
Some of the basic techniques that can improve the quality of your photos include:
- Sharpening — to draw in clarity of the product details
- Brightening — to improve the lighting
- Color correction — to bring the image colors true to life
- Removing background — to potentially remove hard shadows where possible
Changing background — change the background of photo online to make your product photos look even better
7. Optimize the images for sales channels
Once you’ve taken great photos and you’re certain they’re ready for the eyes of your customers, you need to optimize them for search engines, your web store, and all your other sales channels.
Start with optimizing your photos for faster loading speed. The way to do that is to follow the sizing of each channel, as they have different sets of requirements. For example, if you’re selling through Shopify, you will need to upload a file size smaller than 20 MB, which can be any size up to 5760 x 5760 px or 20 megapixels.
For a marketplace like Amazon, you’d need to upload an image with pixel dimensions that are a minimum of 1,000 in height or width.
The next thing you need to do is add SEO-friendly alt-text to the images, this describes what the image is. For example, if you sell hardware and construction items such as stainless steel door handles, you can add your alt-text as “stainless steel material door handle.” When adding alt-text, you need to be descriptive but concise and add relevant keywords. This copy will explain the image to Google and show up if your image refuses to load.
Where do you store all of these newly-taken and optimized product photos? Well… the best place to store them is a centralized location instead of different files, as you risk losing them that way. For instance, you can store them in digital asset management (DAM) software or in a product information management (PIM) tool.
While the first option is great, the second option lets you store your product photos in the same place as your other product information, making your life much easier. When you download this Ultimate PIM Buyer’s Guide ebook, you’ll learn more about what a PIM tool can do and how storing all product information in a single location can benefit your business.
Final thoughts on small business product photography
Using visuals to showcase your product online is important as it helps keeps your customers engaged. On top of that, it’s a way for them to learn more about your product and what benefits they will get should they buy it.
While professional photography with an expert photographer is a worthy investment, it can be a bit pricey. If you don’t have that kind of budget, you can use the tips above to understand how to photograph products. They’ll help you produce high-quality and compelling product photos.
Editor’s Note: This article was originally published in January 2022 and has been updated for accuracy and comprehensiveness.
Frequently Asked Questions
How do you take good pictures of your product?
Follow these easy steps:
- Decide on the Photo Type: Choose between a straightforward product-only image or a lifestyle photo that shows your product in use.
- High-Resolution Images: Capture images in high resolution to show your product’s detail and quality clearly.
- Multiple Angles: Provide a 360-degree view of the product through photos from various angles, mimicking the in-store examining experience.
- Use a Tripod: Employ a tripod to ensure stability for consistent, sharp images without blur.
- Optimal Lighting: Use natural or studio lighting to avoid hard shadows and maintain true-to-life color tones.
- Edit on a Big Screen: Transfer photos to a computer and use photo editing software for detailed editing, to ensure the product looks its best.
How do small businesses take good product photos?
Small businesses can take good product photos by using high-quality smartphones or cameras and setting them up on tripods to ensure stability and clarity. They should take advantage of natural lighting or invest in affordable lighting solutions like ring lights to create well-lit, shadow-free images. It’s essential to capture multiple views and angles of the product to provide a comprehensive visual experience. After taking the photos, businesses should use image editing software on a computer to fine-tune the details and optimize the images for their online sales channels.
What is the best background color for product photography?
The best background color for product photography is typically white. White is preferred because it ensures that the product is the focal point without any distractions, reflects light well, and maintains consistent color balance. It also makes it easier to clip the product out of the background for use in various types of marketing collateral. However, the choice can depend on the specific aesthetic and branding requirements of the product and company.