
So, you’ve set up your website with WordPress and built an online store with their plugin WooCommerce—congratulations! Because that’s no easy feat. But now, you’re diving into the world of imports into your WooCommerce store, and you’re realizing it’s a little bit more complicated than you had hoped.
Well, don’t fret because, in this blog post, we’re going to discuss all the different ways you can get your product data into your WooCommerce store; from manual imports, bulk imports using plugins, and imports using PIM systems, you’ll be a pro in no time.
The basics of importing product data into WooCommerce
Correctly importing product data is crucial for any ecommerce business. Ideally, you want to limit errors and save time by correctly importing all of your data the first time around.
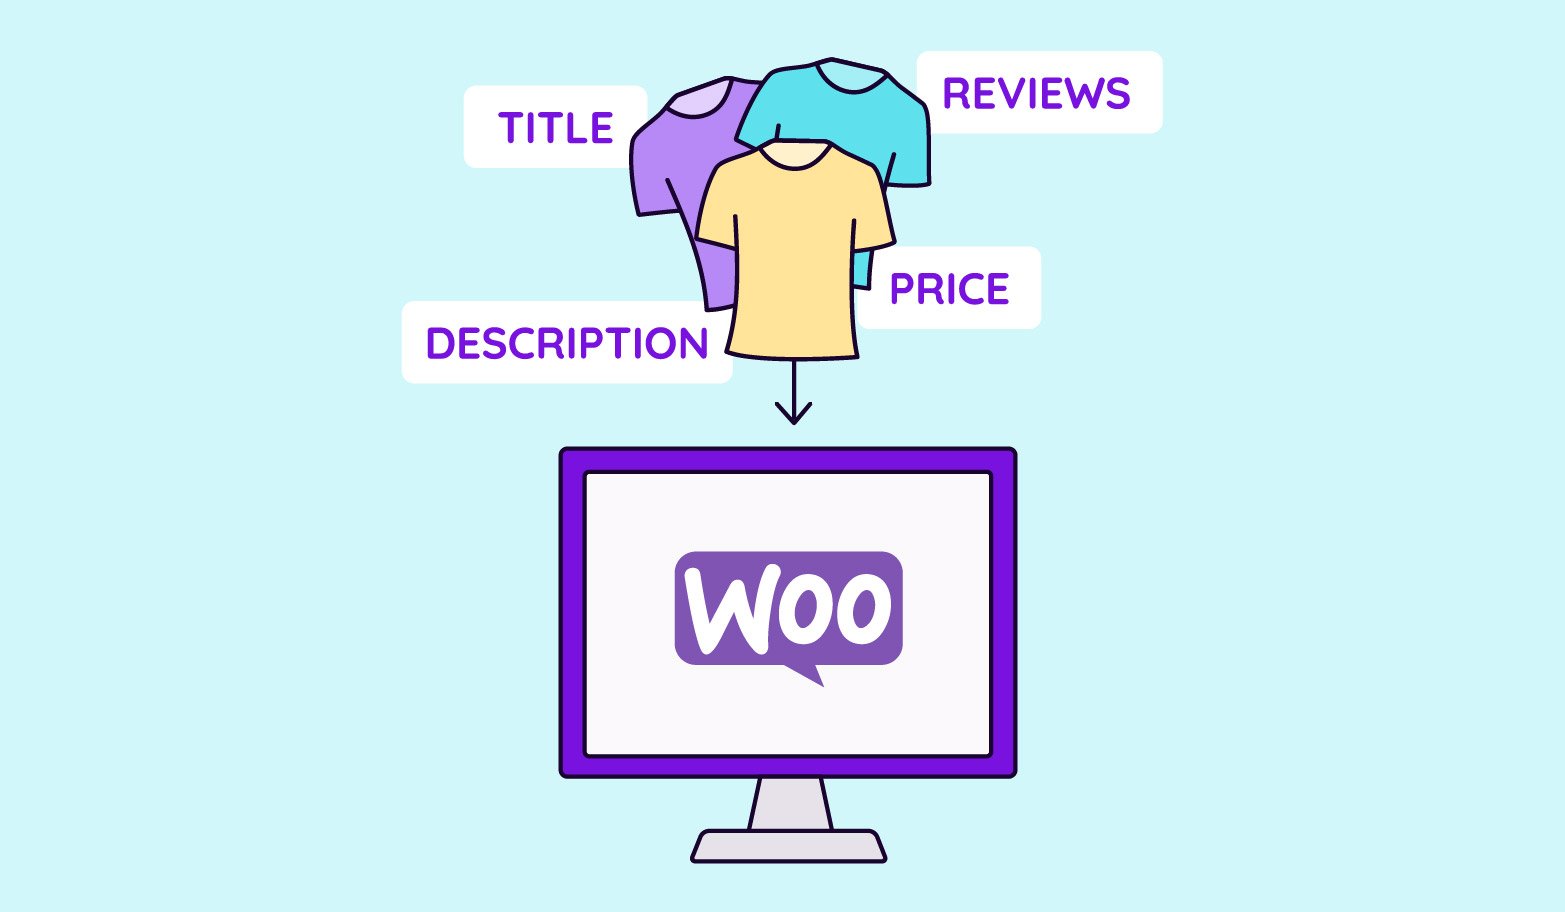
But before you can import your data, you first need to set up a product database in a spreadsheet. Make sure your spreadsheet is well-organized and includes columns for essential product information such as SKU, title, description, price, and stock levels. For more information about setting up your product database in spreadsheets, check out our blog post on how to build a product database In spreadsheets.
Once you have all of your product information stored in a database, you’ll need to export it to a CSV or TXT file to import it into your WooCommerce store.
CSV guidelines for WooCommerce
You need to make sure your CSV is set up correctly to be able to import your data into your WooCommerce account. For a seamless import, use these WooCommerce guidelines to make sure your CSV is setup for success.
- CSVs should be in UTF-8 format.
- Dates should be defined for the store’s local time zone.
- Use 1 or 0 in your CSV if importing a Boolean value (true or false)
- Multiple values in a field get separated with commas.
- Wrapping values in quotes allows you to insert a comma.
- Prefix the id with id: if referencing an existing product ID. No prefix is needed if referencing an SKU. (For example: id:100, SKU101)
- Custom meta is supported/imported but only plain text – no support for JSON or Serialized data.
- Taxonomy term hierarchy is denoted with >, terms are separated with commas.
- Draft products are not exported, only published and privately published products.
- It's not possible to assign a specific post ID to a product on import. Products will always use the next available ID, regardless of the ID included in the imported CSV.
- Images will need to be pre-uploaded or available online in order to be imported into your WooCommerce store.
If you’re starting from scratch and you don’t have your products uploaded anywhere, it’s best to title the columns based on the labeling system within WooCommerce.
Here are the basic columns that match WooCommerce’s labeling system that you could start with:
- Type – Type of product — simple, variable, grouped, or external.
- SKU – Unique identifying number of the product.
- Name – Name of the product.
- Description – Detailed information about the product.
- Short Description
- Regular Price
- Sale Price
- Categories – Which category does the product belong to — clothing, appliance, music, etc.
- Images – URLs of images you want to be displayed for the product.
Importing using WooCommerce’s built-in feature
Now that you have your CSV sheet ready, it’s time to get started with your import. You can Import your products by following these steps:
1. Log in to your WooCommerce dashboard:Access your WooCommerce admin panel and navigate to the "Products" tab.
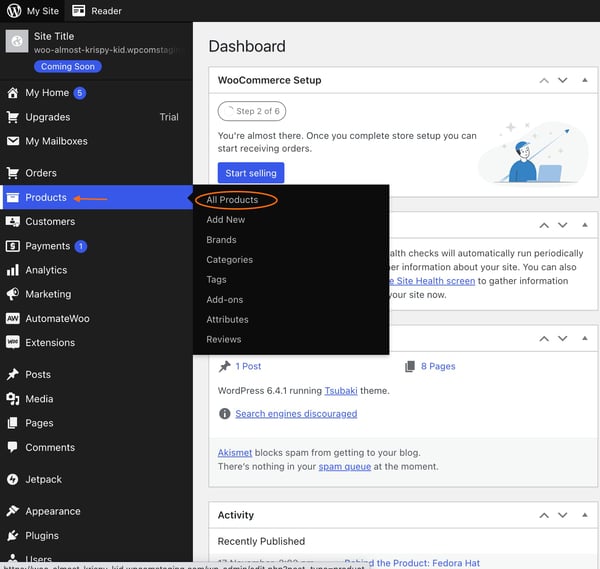
2. Choose the import option:
Within the "Products" tab, click on "Import" to initiate the import process.
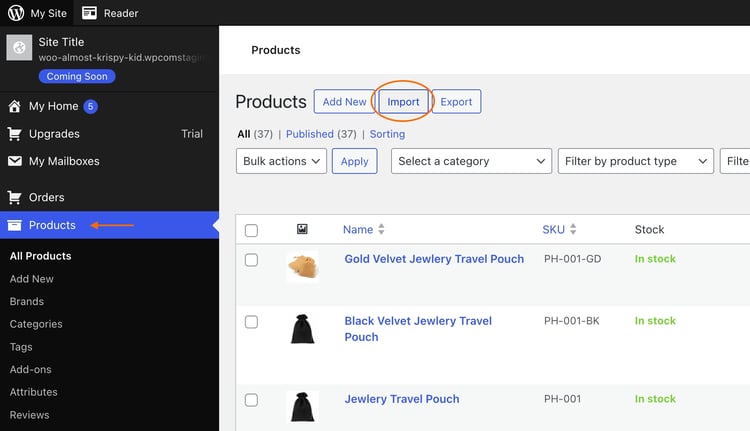
3. Upload your spreadsheet:
Select your prepared spreadsheet and ensure that the column headers match WooCommerce's product fields. You can check out their column header reference and download an example for a smooth mapping process.
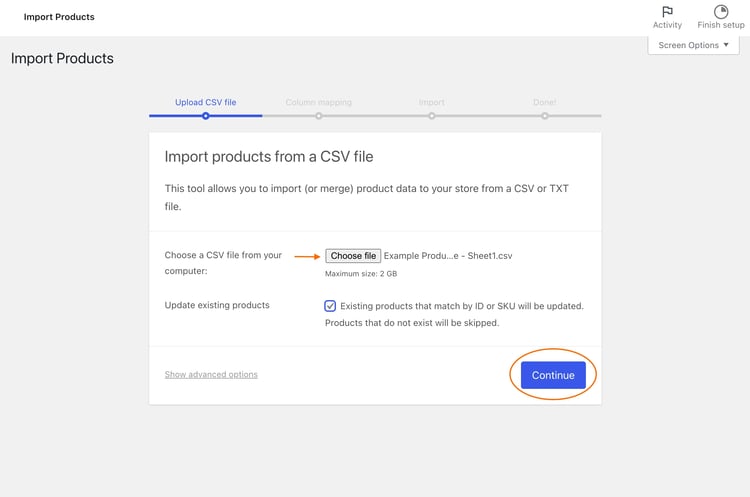
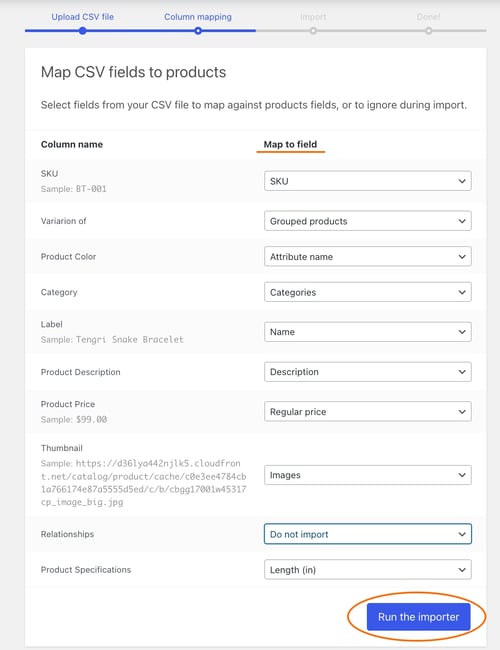
4. Map your data:
WooCommerce will automatically attempt to map your spreadsheet columns. Verify the mappings and make adjustments if necessary. This step is crucial for accurate data transfer.
5. Review and confirm:
Take a moment to review the import settings and make sure everything is in order. Once everything looks right, confirm the import, and watch as your product data seamlessly populates your WooCommerce store.
Now that your products are live in your WooCommerce account, you can add and enrich them with more data according to your needs. Keep in mind that although you can house your product data within your store, its purpose is not to be a central source of truth for your data. Keep and maintain a product database from which you can continuously import and update the data in your WooCommerce store.
Importing into WooCommerce using a PIM tool
Now that you know how to import directly within the WooCommerce platform, let’s take a look and see how you can import your product data when you’re using a PIM for WooCommerce product information management.
Note: Since we are Plytix PIM experts, we’ll use Plytix as our example here. Check with the PIM provider you’re interested in using to see how you can import your product data from that PIM into WooCommerce.
Whereas in our previous steps, you would have had to keep and maintain a spreadsheet as your product database and then use that to import the data into your WooCommerce store, a PIM effectively replaces your spreadsheet.
Using a PIM (or Product Information Management) tool acts as the central source of truth for all of your product data. From there, you’re able to export all of your enriched and accurate data to whichever ecommerce platform you may need.
For WooCommerce, there are 2 main ways to get your data from the PIM to your store.
1. Doing it manually
Start by logging into your Plytix PIM account. Upload your product data to Plytix and use the platform's intuitive interface to enhance and enrich your product information. Once your data is polished and enriched within Plytix, export it in a compatible format, such as CSV or Excel. From here, you would complete the import into your WooCommerce store with the same steps we discussed for the built-in feature.
2. Using a plug-in combined with Plytix Channels
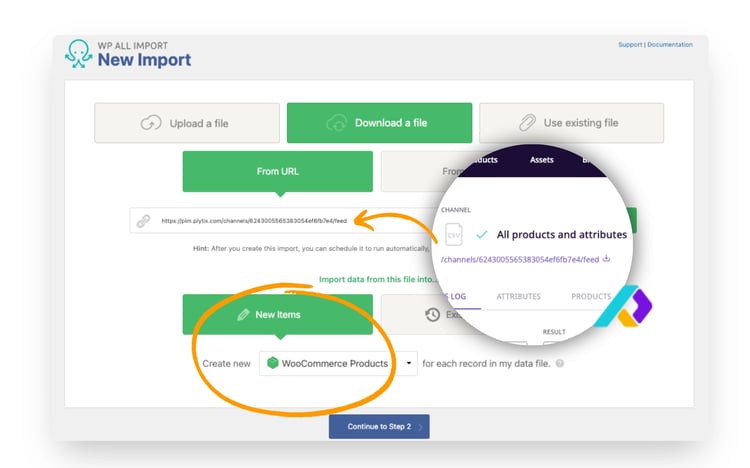
Although using the built-in importer function works well, you can also use a plugin called “WP All Import” to help you automate the process. To do this, you’ll need to have a Plytix account with at least 1 output for a product feed. A product feed is essentially a live link where all of your product information is sent in a CSV or XML format.
How to connect Plytix and WP All Import
After installing the plugin, it will appear under your WooCommerce tab as “All Import.” Click it, and you’ll see three options for how to import your data. You can choose from uploading a file, using a previously uploaded file, or downloading from a URL.
How to set up automated uploads
From here, you’ll be able to use the product feed URL you created with Plytix and adjust your settings to continuously run up-to-date information from the PIM to your WooCommerce store.
How to import new or overwrite existing items
You’ll need to select if you want to import data from this file into new items (products) or existing ones and then continue to the following page.
How to import specific data
The next page will show you all of the elements from your file, and you can choose which elements you specifically want to import. From there, you’ll simply drag and drop your product data into the appropriate fields. 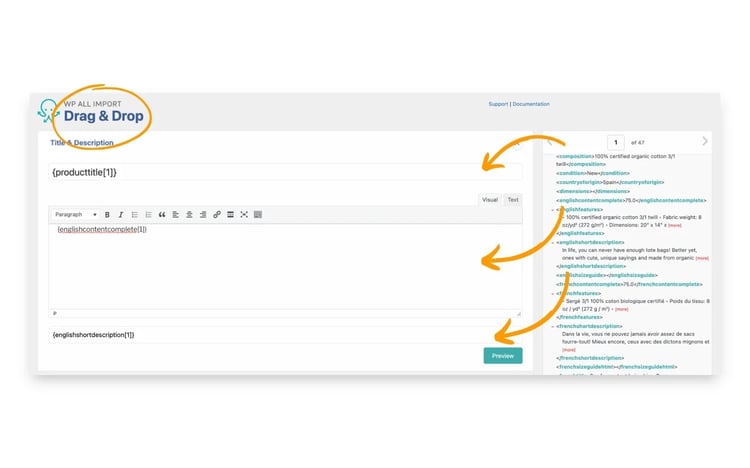
For a more in-depth tutorial on how to use plugins to import your product data from Plytix, check out our help center article: Importing Products to WooCommerce via URL Feed.
3. Using a Feed Management System
For an even more automated approach, it’s recommended to integrate your PIM system with a Feed Management tool. This method allows for a seamless transfer of data between your Plytix account and your WooCommerce store.
In your chosen Feed Management System, configure the settings to match WooCommerce's requirements. Map the Plytix data fields to their respective counterparts in WooCommerce.
Activate the data transfer process to sync your Plytix-enhanced product data with your WooCommerce store. This ensures that your store reflects the enriched information you've curated in the PIM.
Troubleshooting and Best Practices
As you continue importing and managing product data for your WooCommerce store, it's essential to be aware of potential challenges and adopt best practices.
- Data quality checks:
Regularly perform quality checks on your product data. Make sure your data is accurate and consistent so that you can provide a seamless experience for your customers.
- Backup your data:
If you’re using spreadsheets, create backups of your existing data before doing any imports or updates. This precautionary step can save you from headaches in case anything goes wrong. - Stay informed about updates:
Keep yourself updated with the latest WooCommerce and Plytix PIM features. By doing this, you can take advantage of new functions and tools that can help you enhance your product management processes. - Utilize Plytix PIM's enrichment tools:
Explore Plytix PIM's enrichment tools to add value to your product information. This includes features like image editing, product descriptions, and categorization.
Congratulations! You've now mastered the art of importing product data into your WooCommerce store, and you've discovered how to use tools (like Plytix PIM, WP All Import, and FMS) to amplify your product management capabilities. By following these steps and incorporating best practices, you're well on your way to running a well-organized online store.

What if your product data actually worked for you?
We’ll show you how Plytix helps you stop fixing data—and start using it.


Think others should see this?
Go ahead and share it.